Log time on Jira Tasks through timegram
Note: Prior to configuring this, it is essential to ensure that a Jira task is present in the timegram account. This is a crucial prerequisite, as logging time on Jira tasks will not be feasible without it.
Integration Steps:
1. Creating a Zap on Zapier:
- Click on "Create Zap" to initiate the integration process.
- Choose "timegram" as the trigger app since we want to log time on Jira tasks through timegram.
- Select the event, in this case, choose "When a User Logs Time".
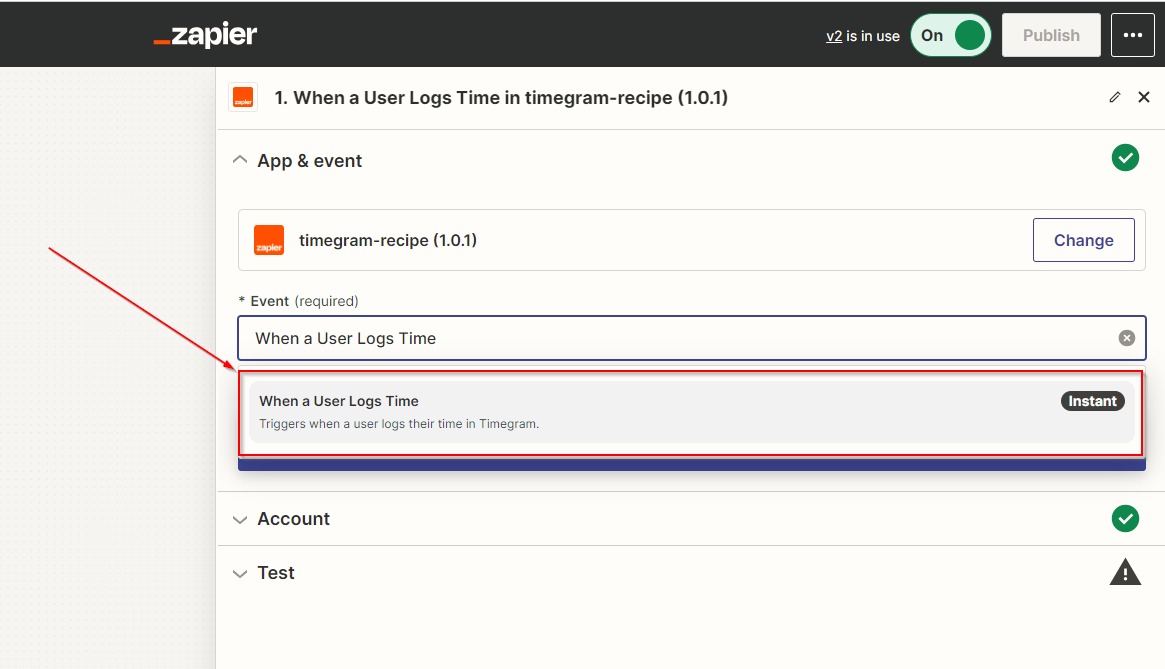
- Click "Continue" to proceed.
Connecting timegram Account:
- Click on "Connect a new account" to connect your timegram account to Zapier.
- In the new window, input your "timegram API key".
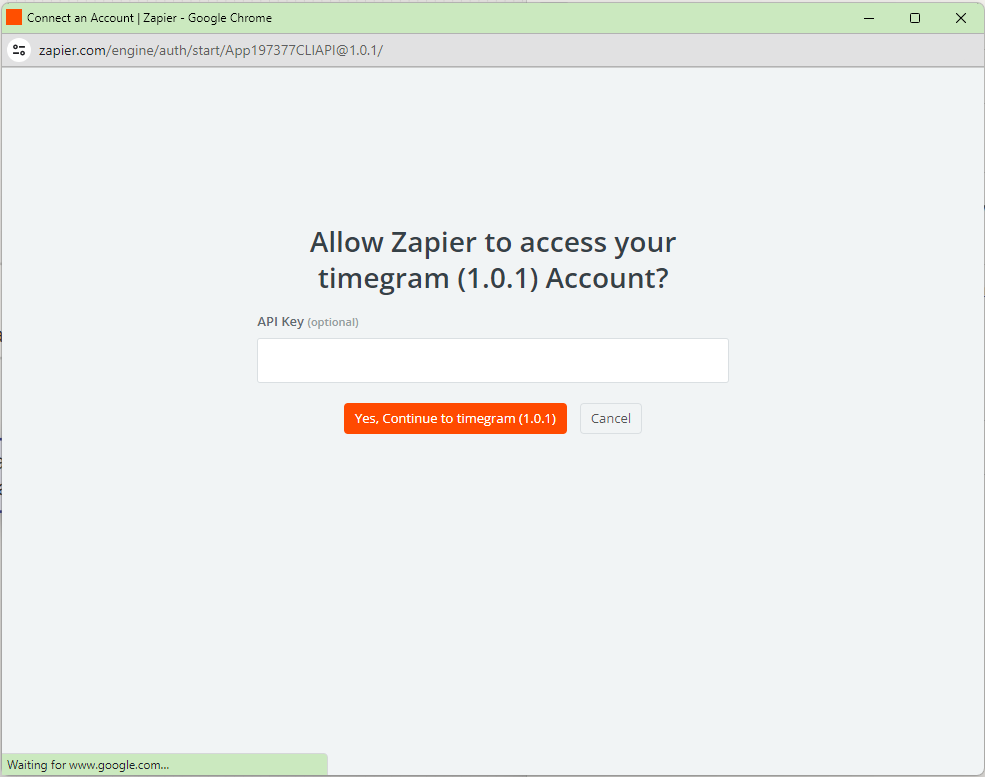
- To obtain the API key, go to your timegram Account "Settings" page, navigate to the integration tab, and click "Generate API Key". Copy and paste the key into the Zapier window.


- Click "Continue".
- Expand the "Test field" and click "Test trigger" to verify the connectivity.

- Once verified, click "Continue with a selected record" to move to the next step.
Configuring Jira account with Zapier:
- Select "Jira Software Cloud" as the action application, as our goal is to locate tasks existing on Jira.
- Select the event, "Find Issue"
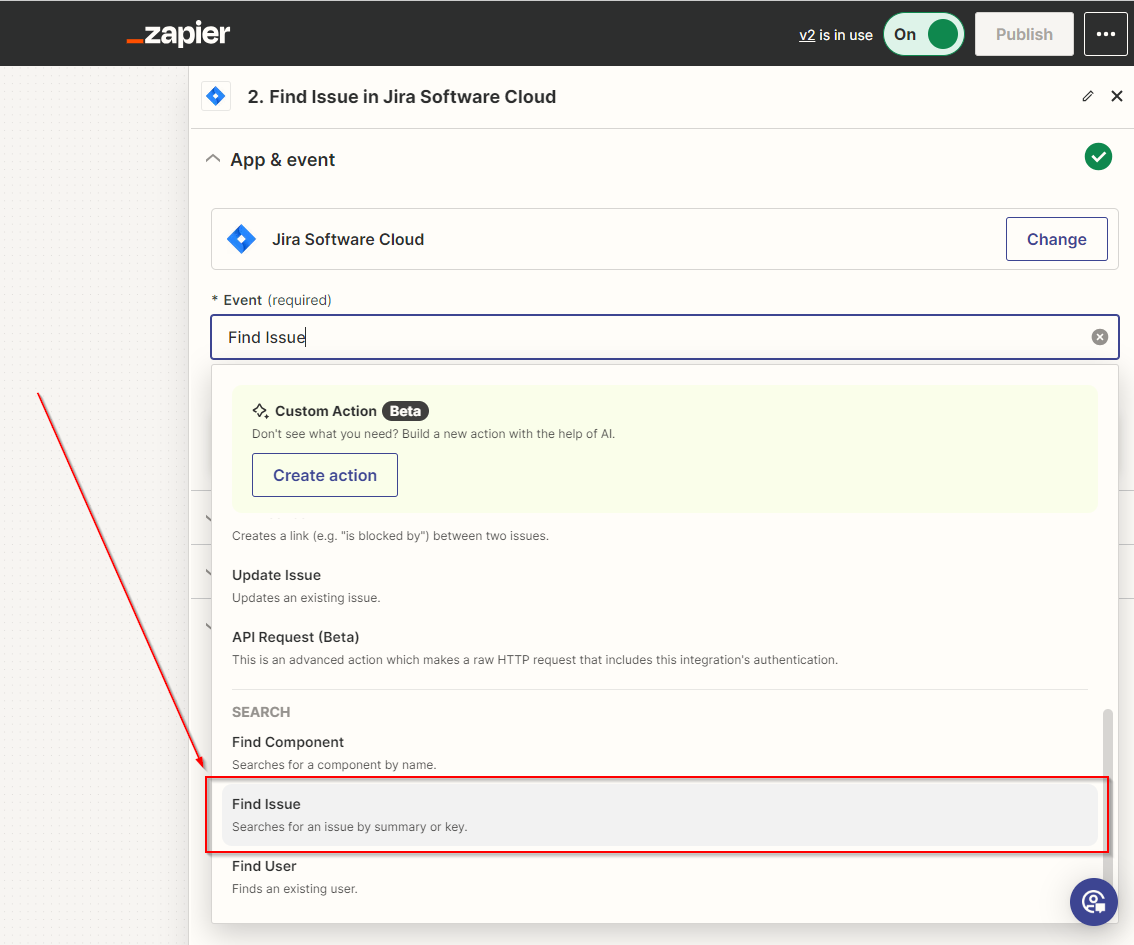
- Click "Continue" to proceed.
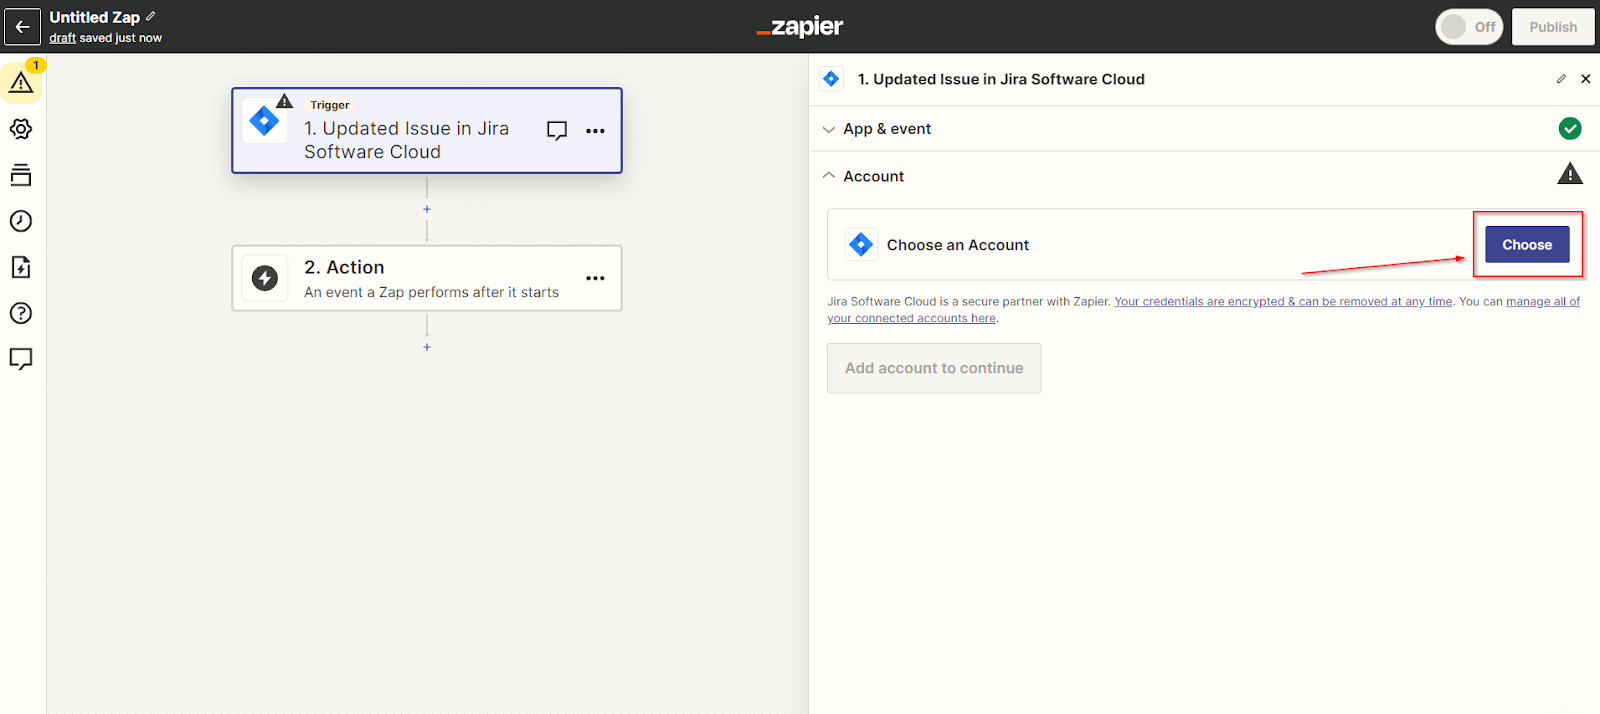
- Click on "Choose Account" to connect your "Jira" account to "Zapier".
- Sign in to your Jira account when prompted.

- Expand the action field and map key
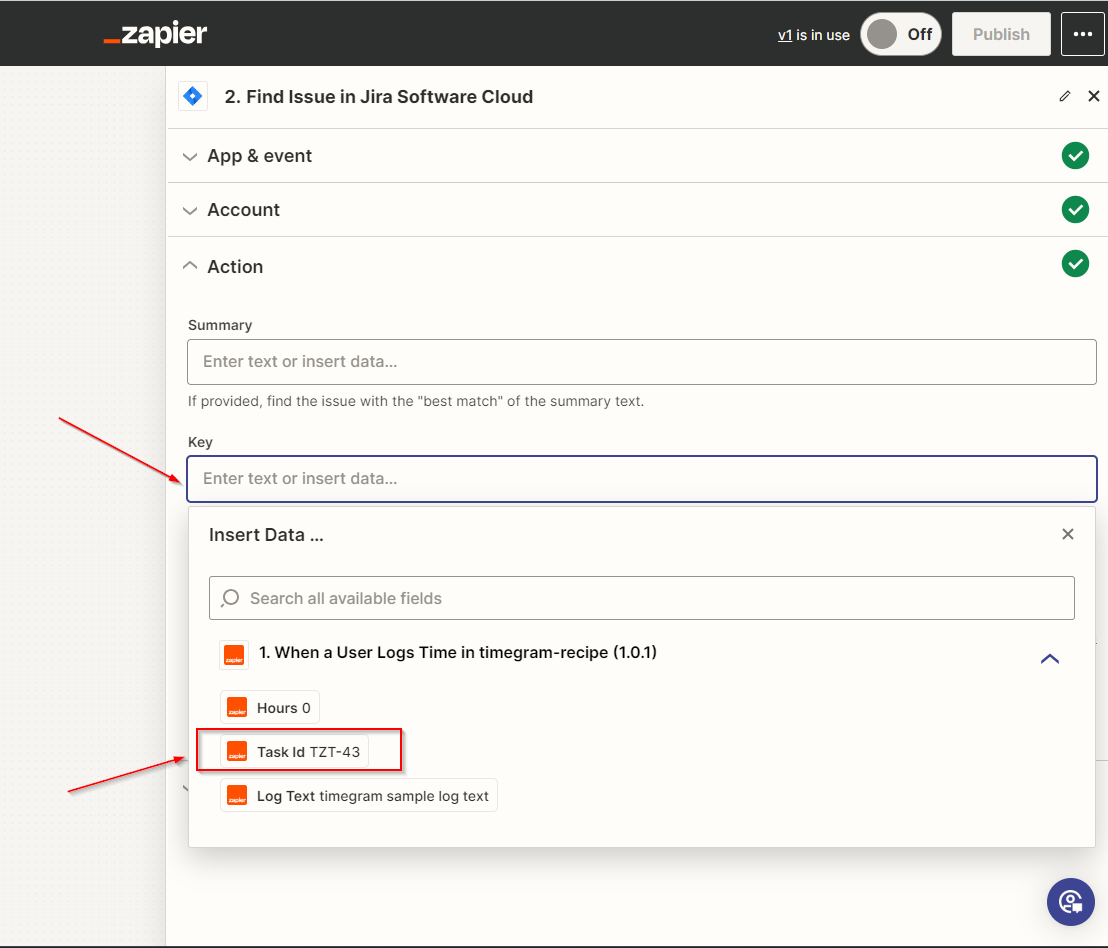
- Click "Continue"
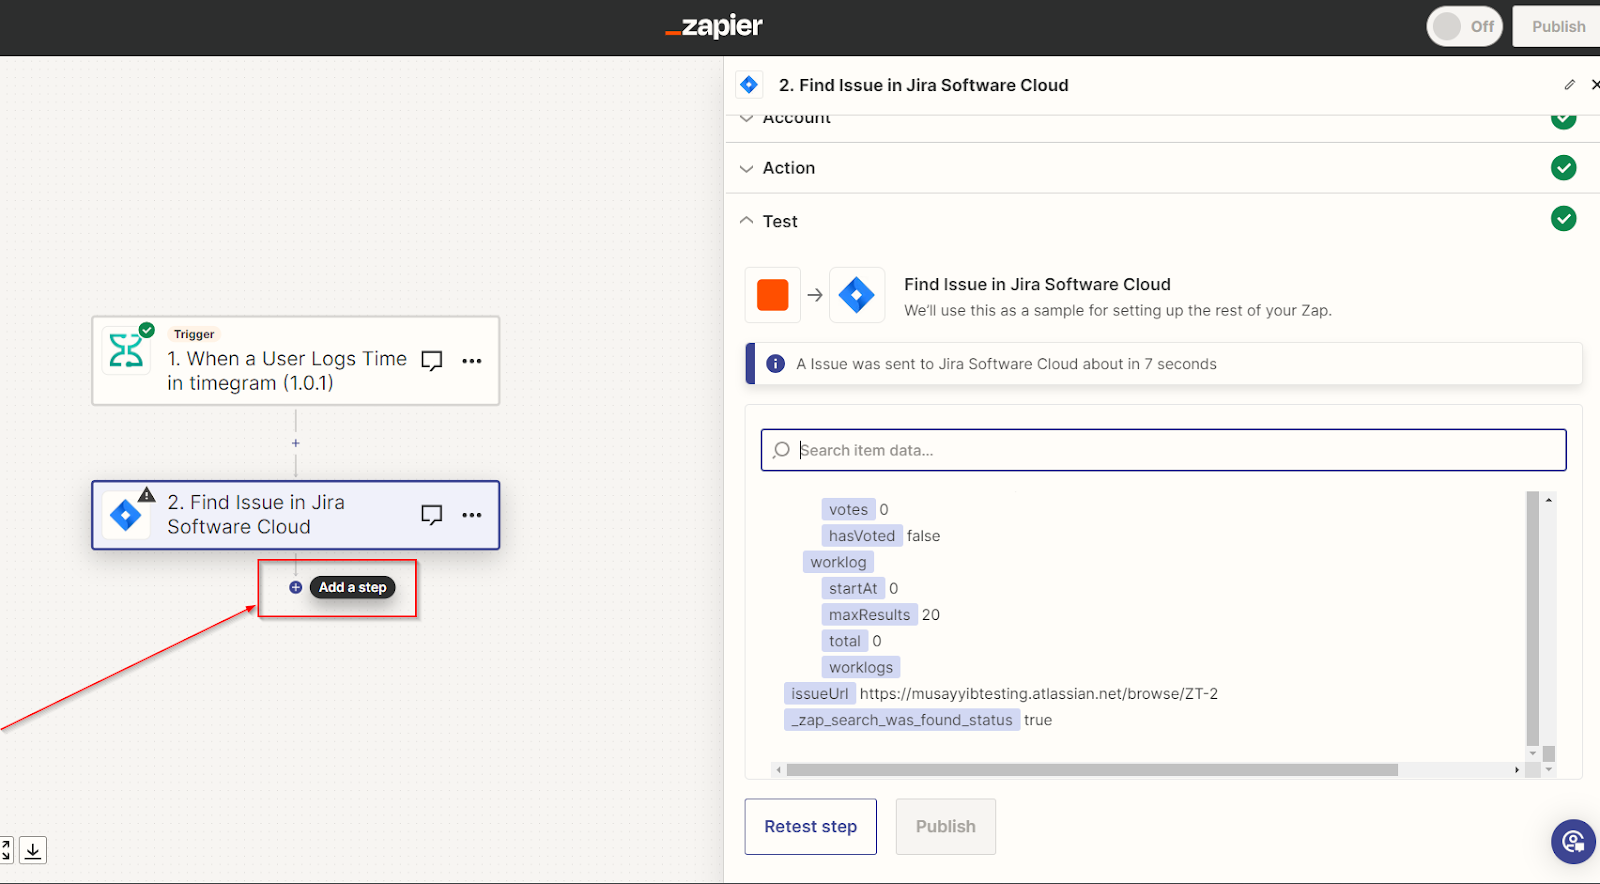
- Expand the test field and click on the "Test step" to verify the connectivity.

- Click "Continue."
- Expand the "Test field" and click "Test trigger" to verify the connectivity.
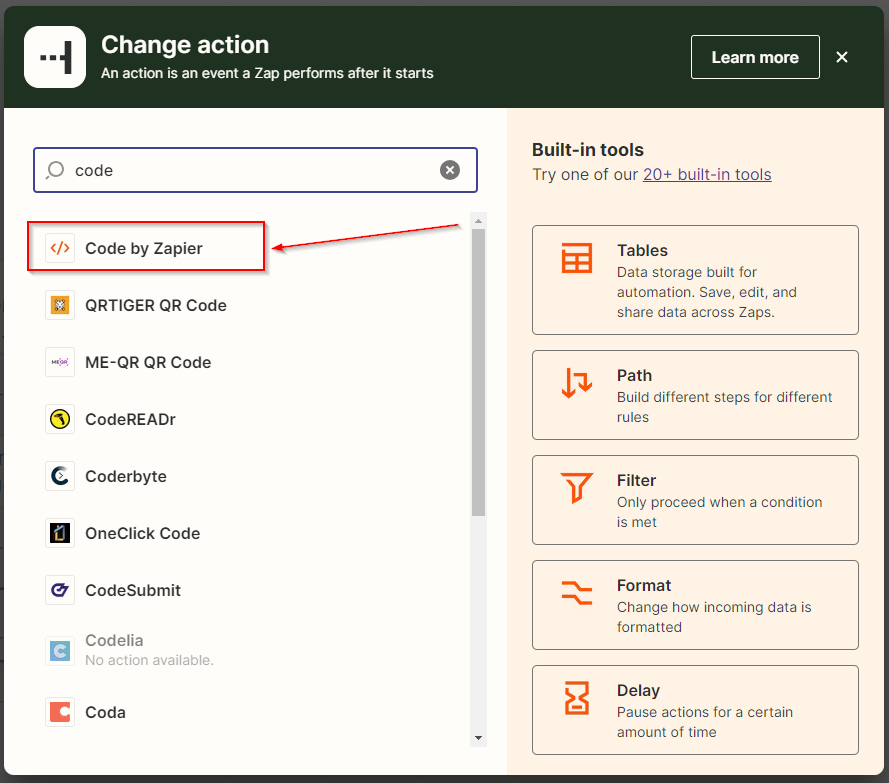
Add "Code By Zapier" as Action:
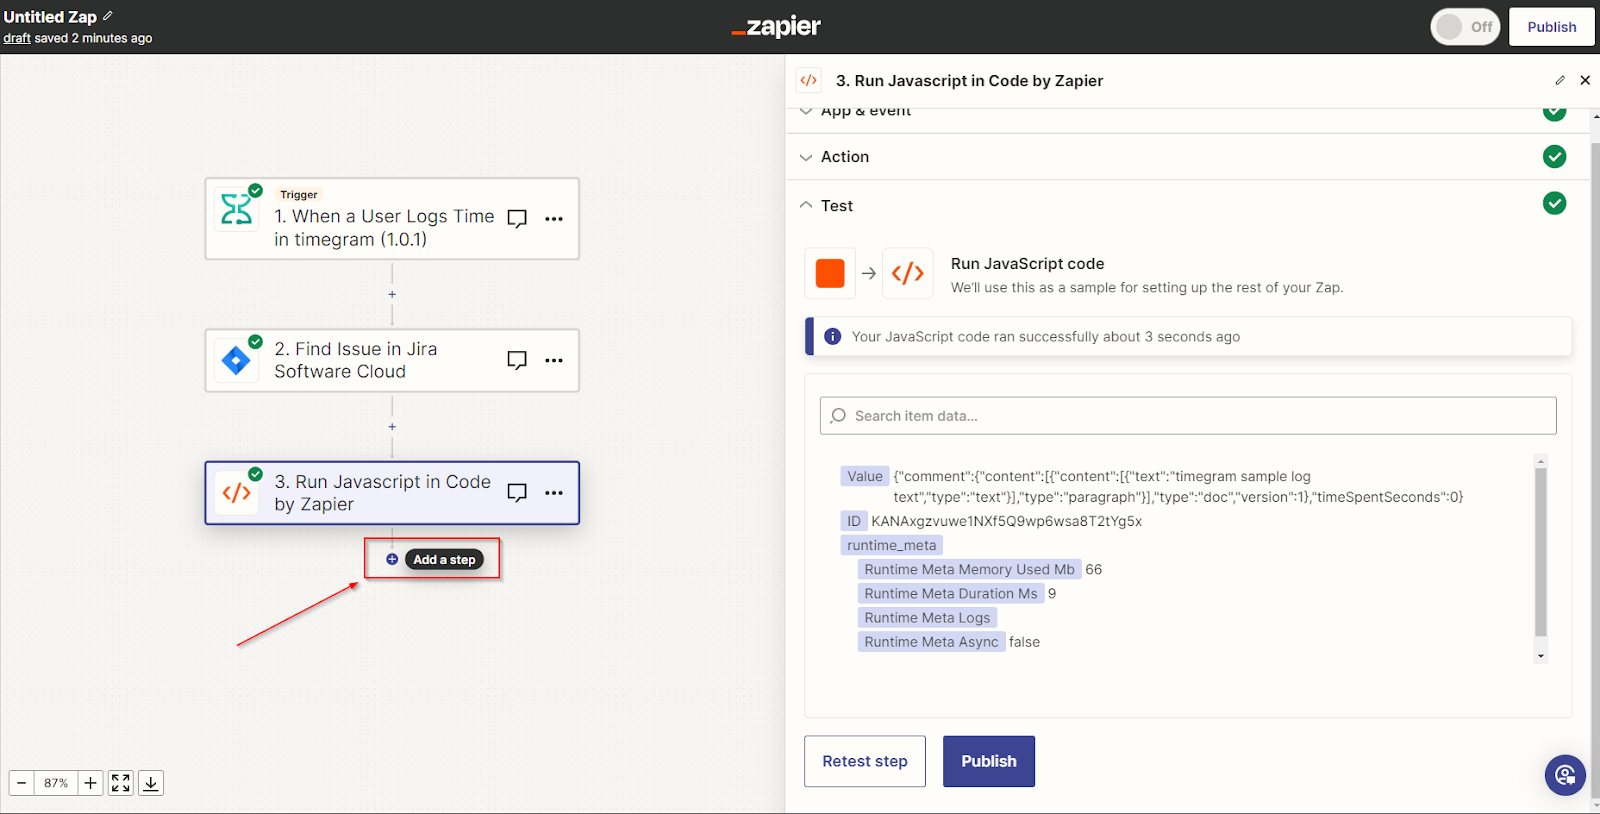
Click on the Add a step to add one more action.
- Add “Code by Zapier” as the new action app.
- Now choose event as "Run Javascript"
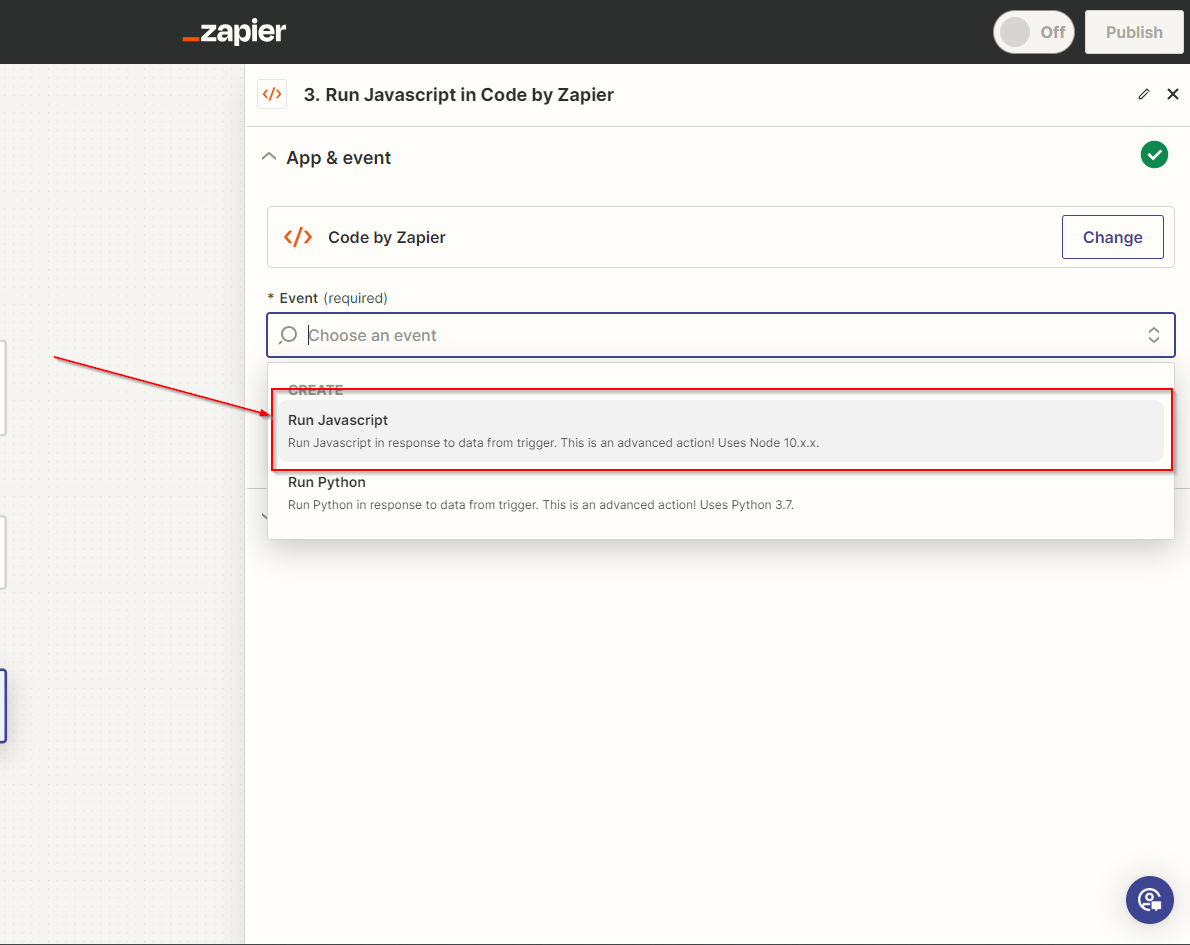
- Click "Continue"
- Now expand "Action" tab to incorporate additional actions
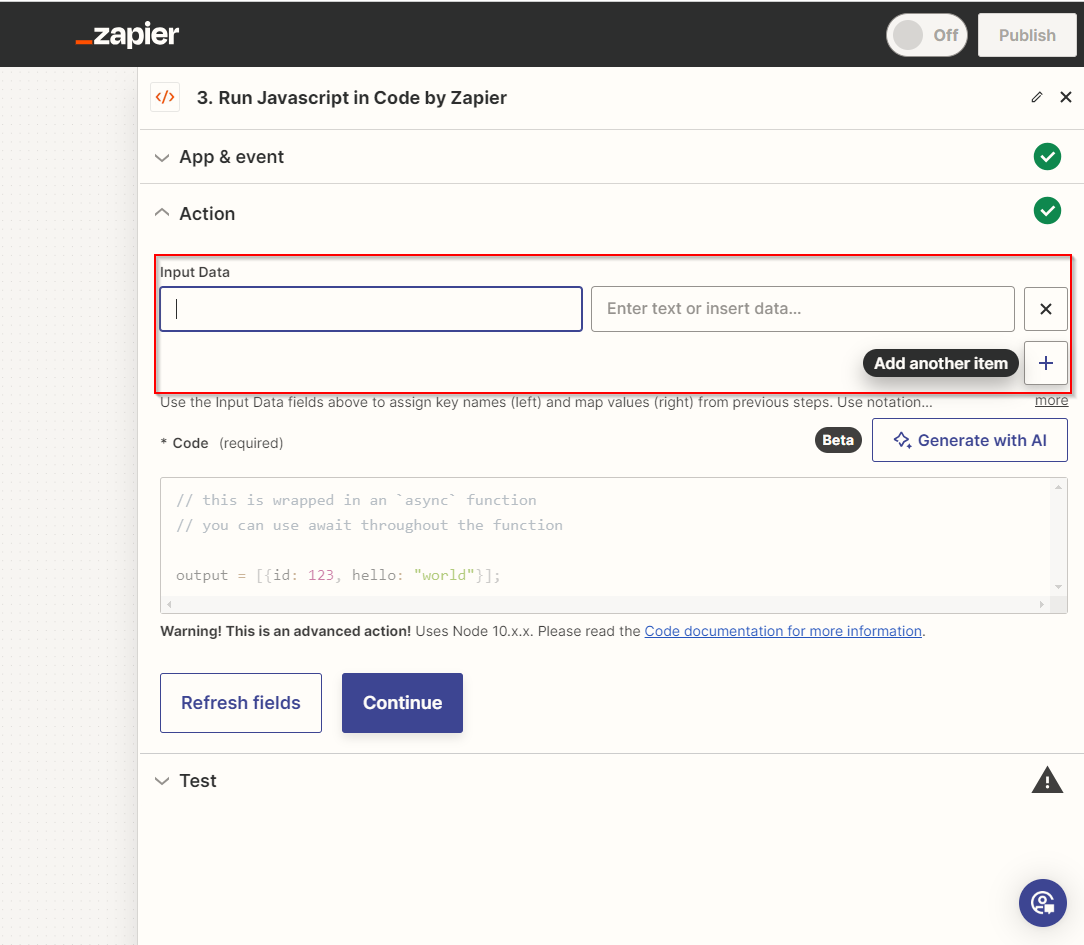
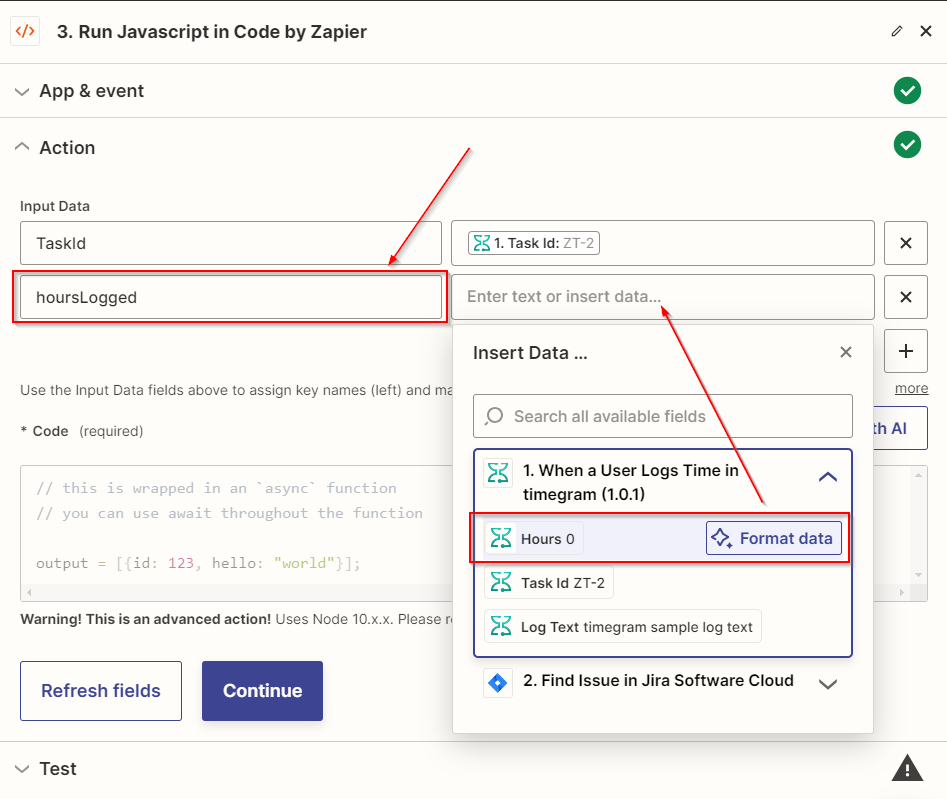
- Include "TaskId" as the input data, and choose this value to associate with it.

- Include "hoursLogged" in the subsequent Input Data field, and choose this value to associate with it.
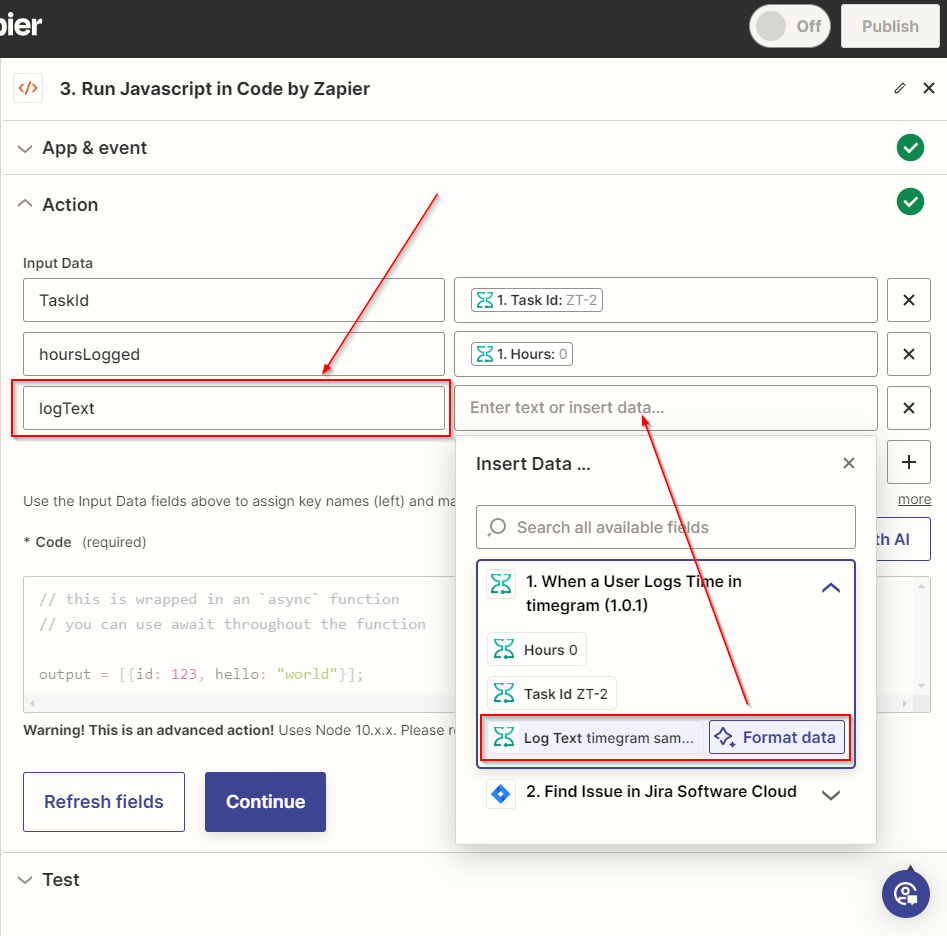
- Now, add an additional field, and add "logText" as the Input data, and choose this value to associate with it.
- Now, it's time to fill the "Code" field.

- Insert the provided code in the field mentioned above.
// this is wrapped in an async function
// you can use await throughout the function
function isBlank(str) {
return (!str || /^\s*$/.test(str));
}
const loggingText = isBlank(inputData.logText) ? "Logged from timegram" : inputData.logText
return {value: JSON.stringify({
"comment": {
"content": [
{
"content": [
{
"text": loggingText,
"type": "text"
}
],
"type": "paragraph"
}
],
"type": "doc",
"version": 1
},
"timeSpentSeconds": inputData.hoursLogged * 60 * 60,
})}
- Click on "Continue"
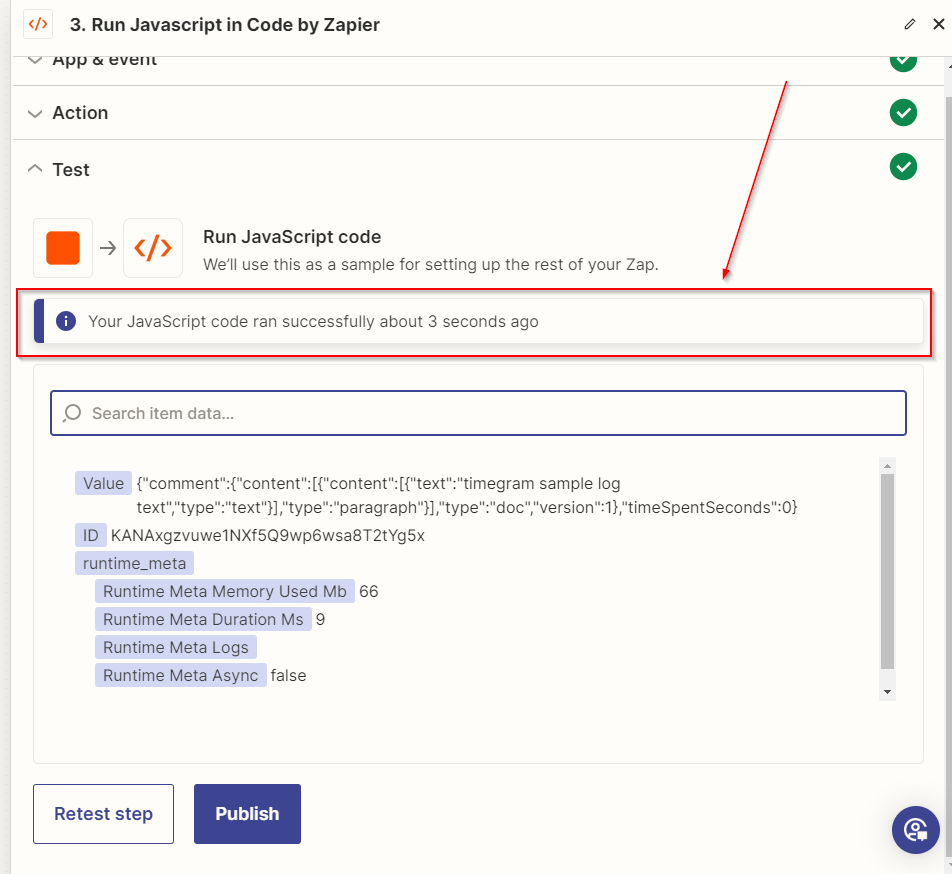
- Now click on "Test step"
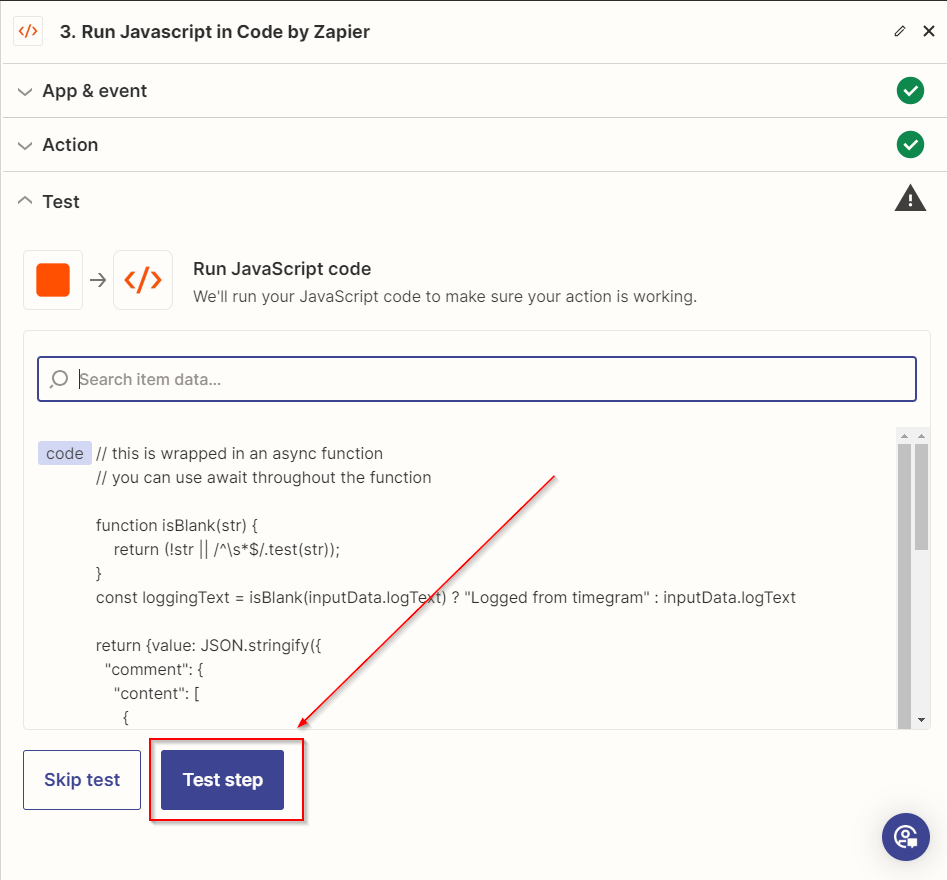
- Upon testing the step, you should see this message displayed on your screen.
Add "Jira Software Cloud" as Action:
- Click on the "Add a step" to add one more action.
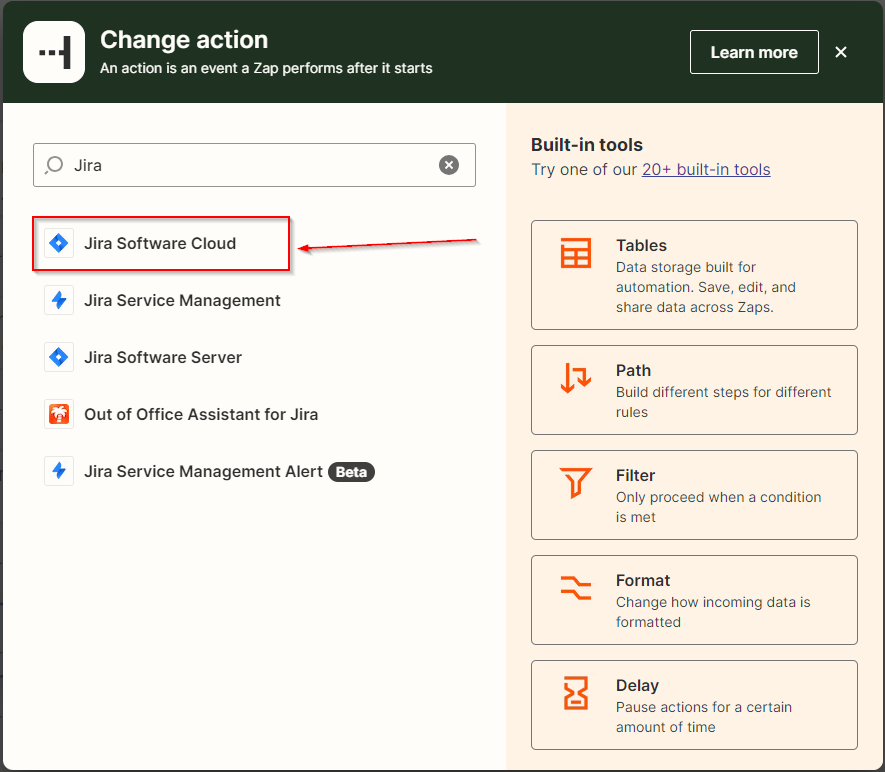
- Add "Jira Software Cloud" as the new action app.
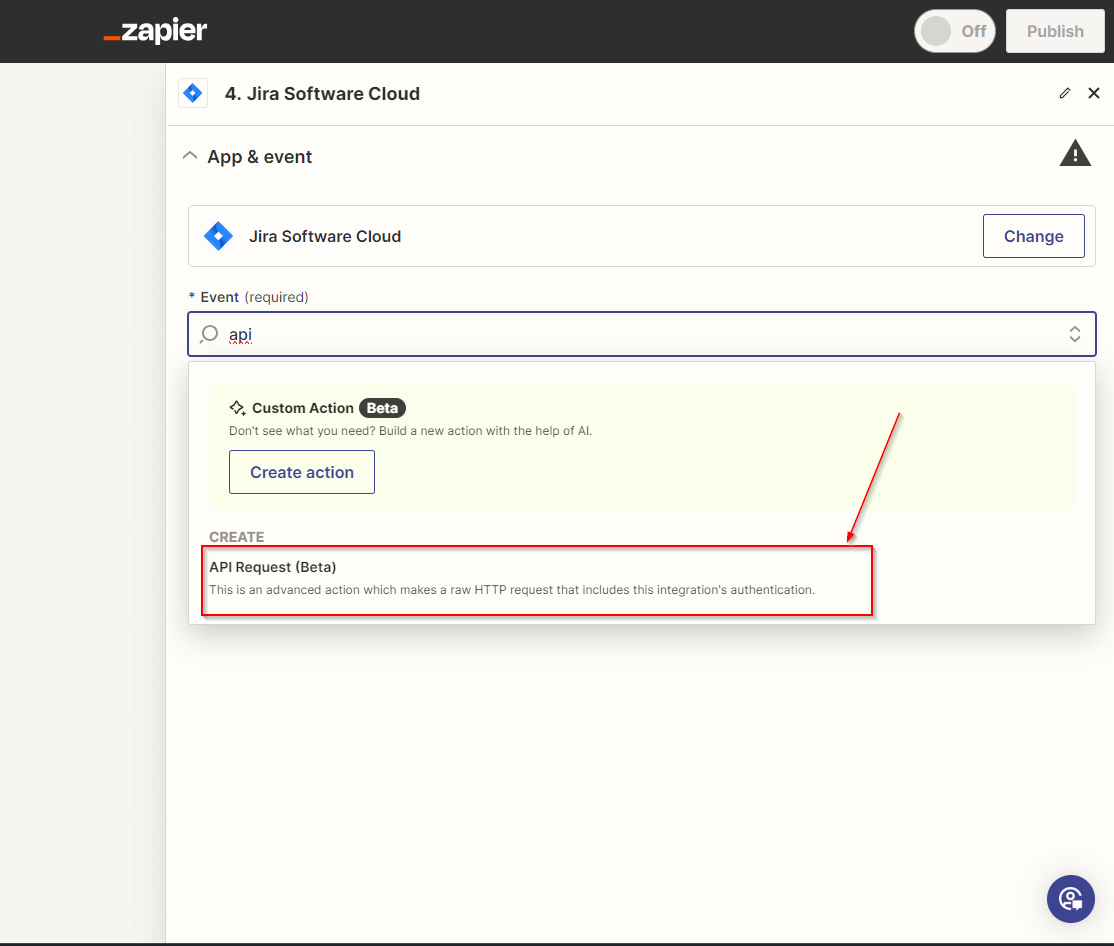
- Choose the event as "API Request (Beta)".
- Click on "Continue"
- Extend the "Action" field to configure and map the necessary actions.
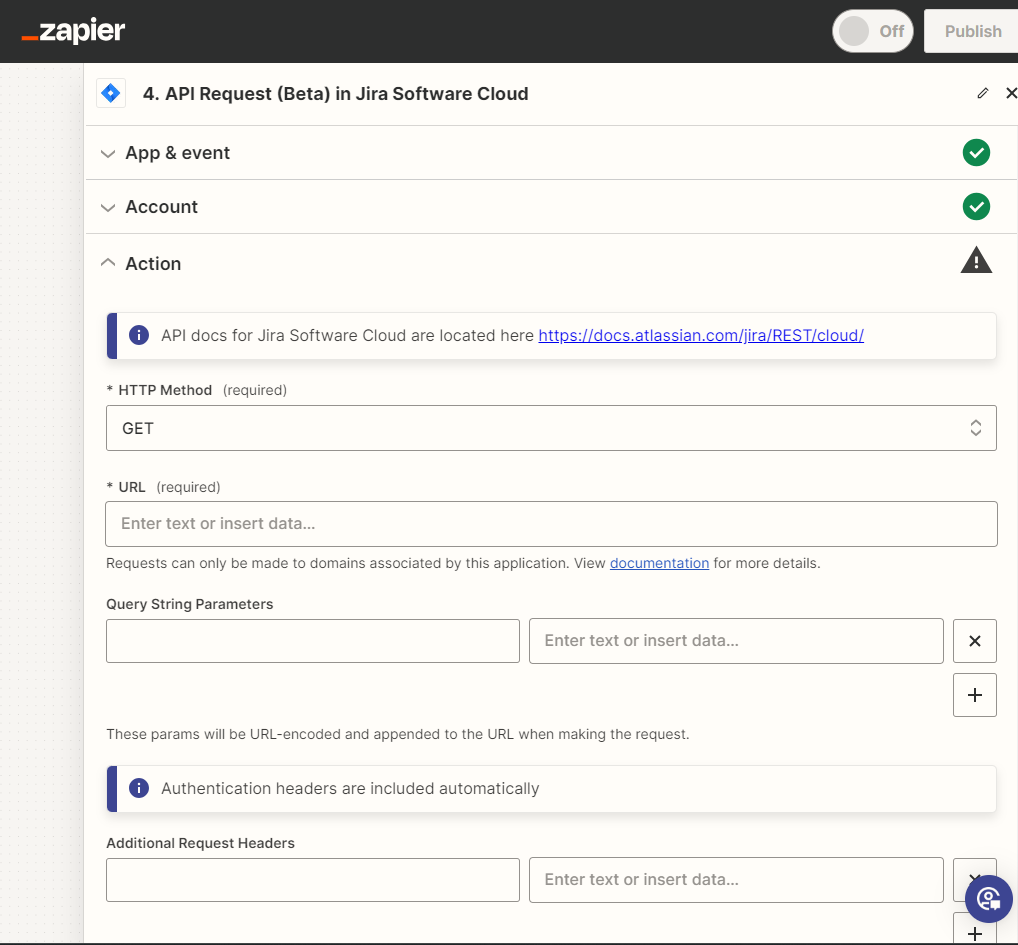
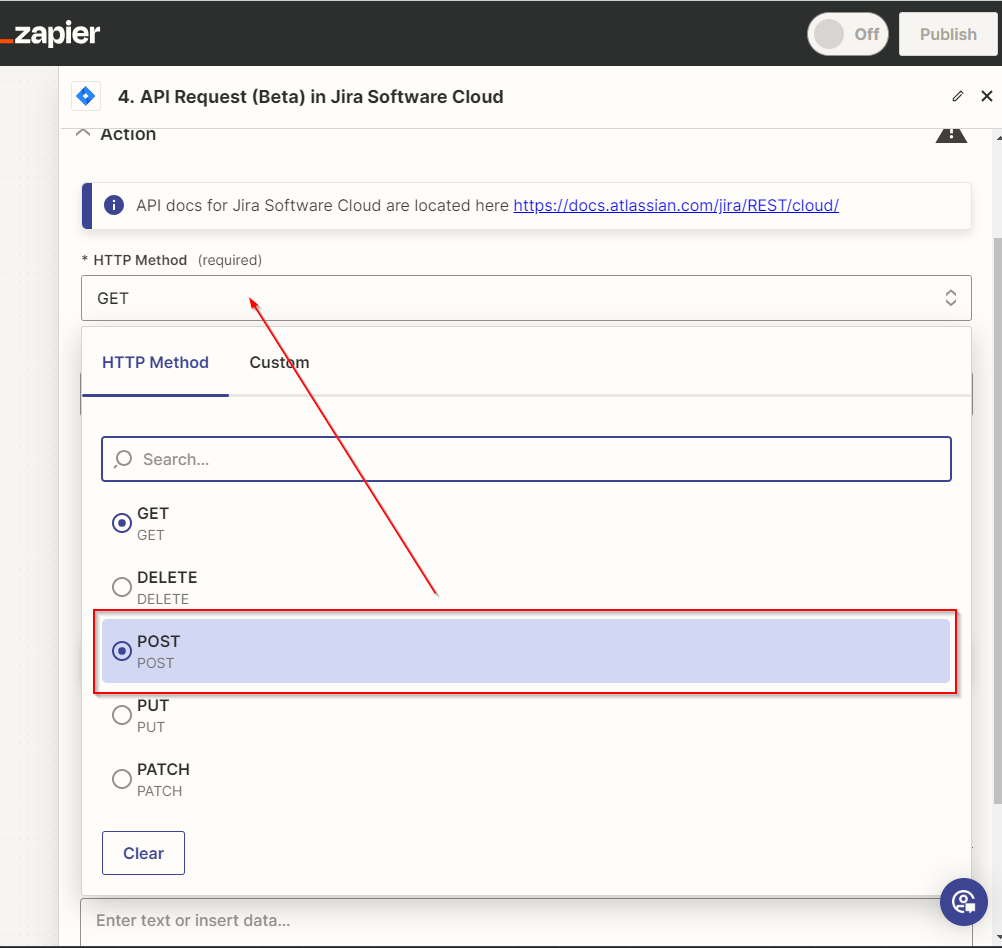
- Navigate to the "HTTP Method" field and switch the method from "GET" to "POST".
- Click the "URL" field and choose the specified field as instructed below.
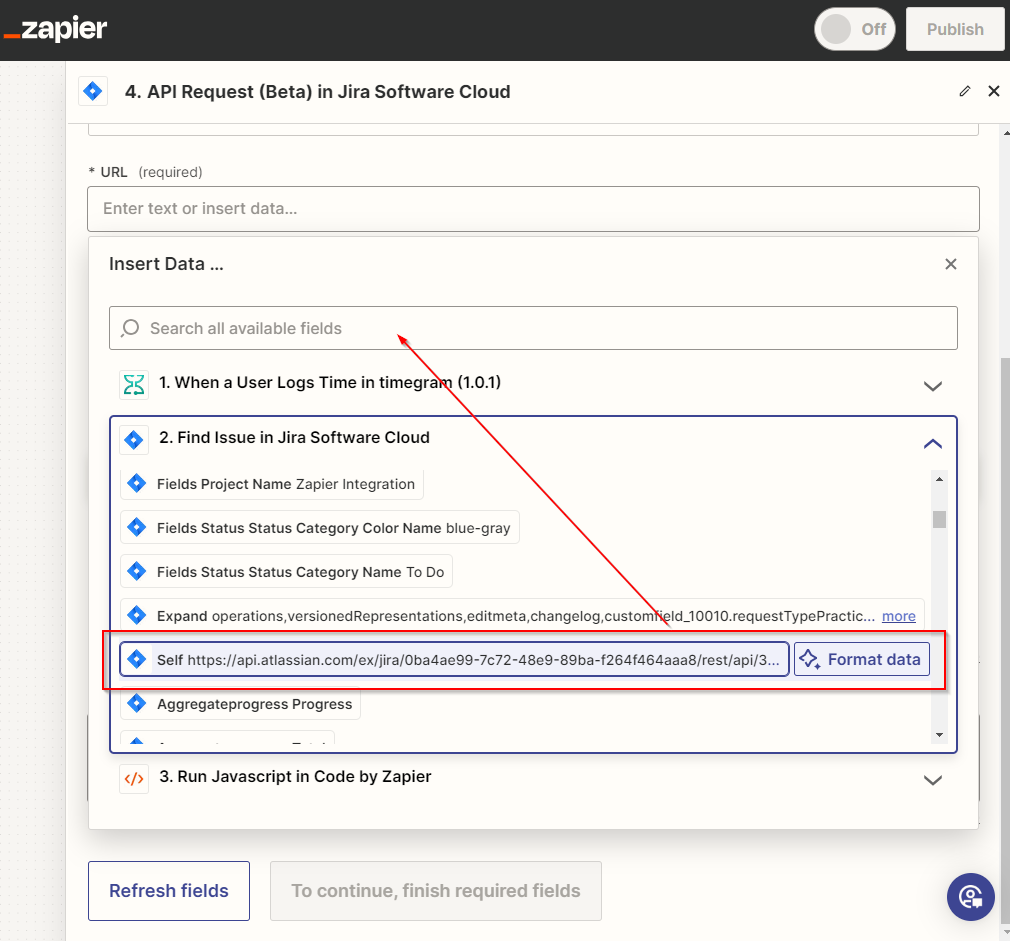
- After choosing the field, don't forget to include "/worklog" next to the selected field.
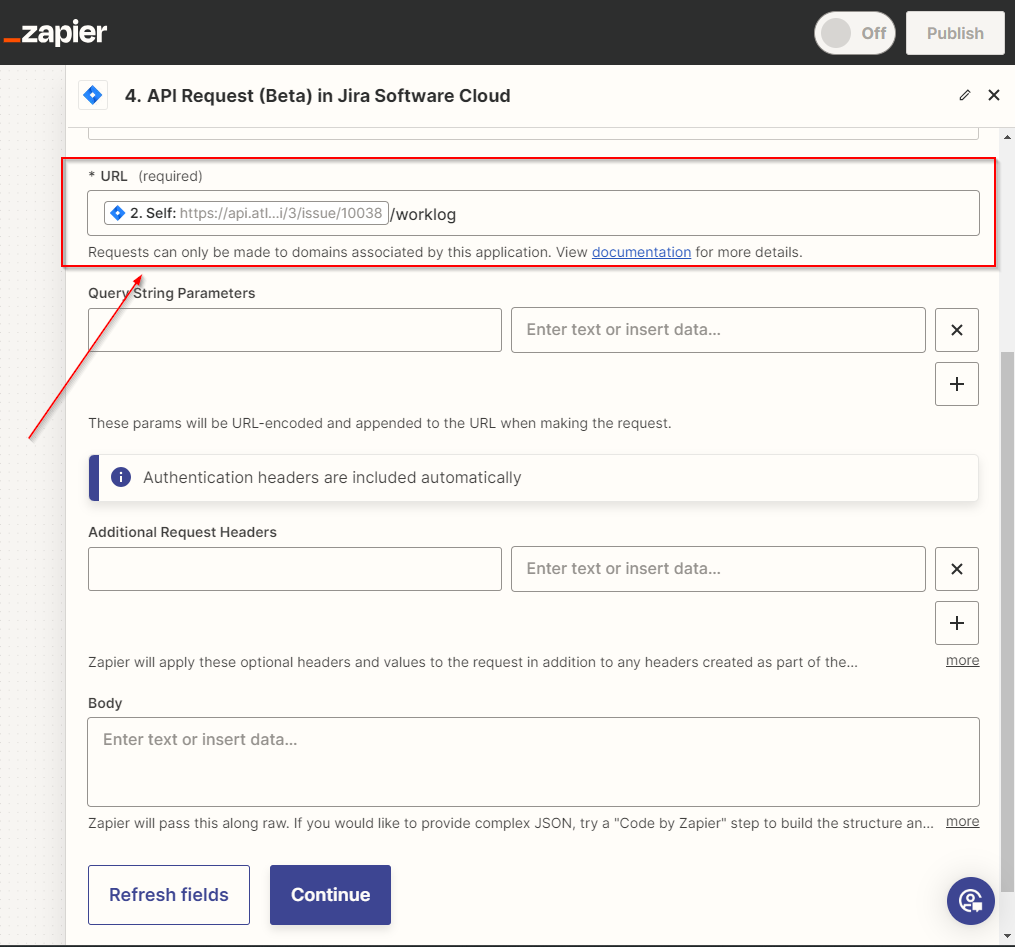
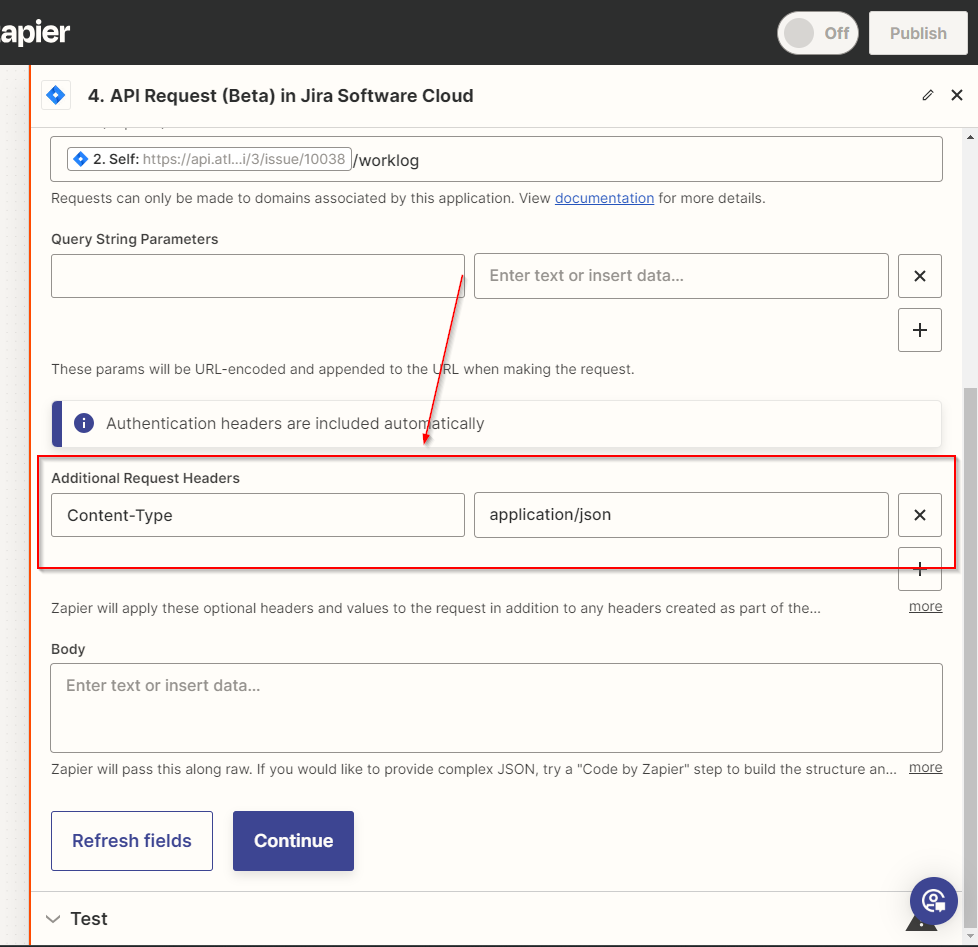
- Scroll down and locate the "Additional Request Headers field".
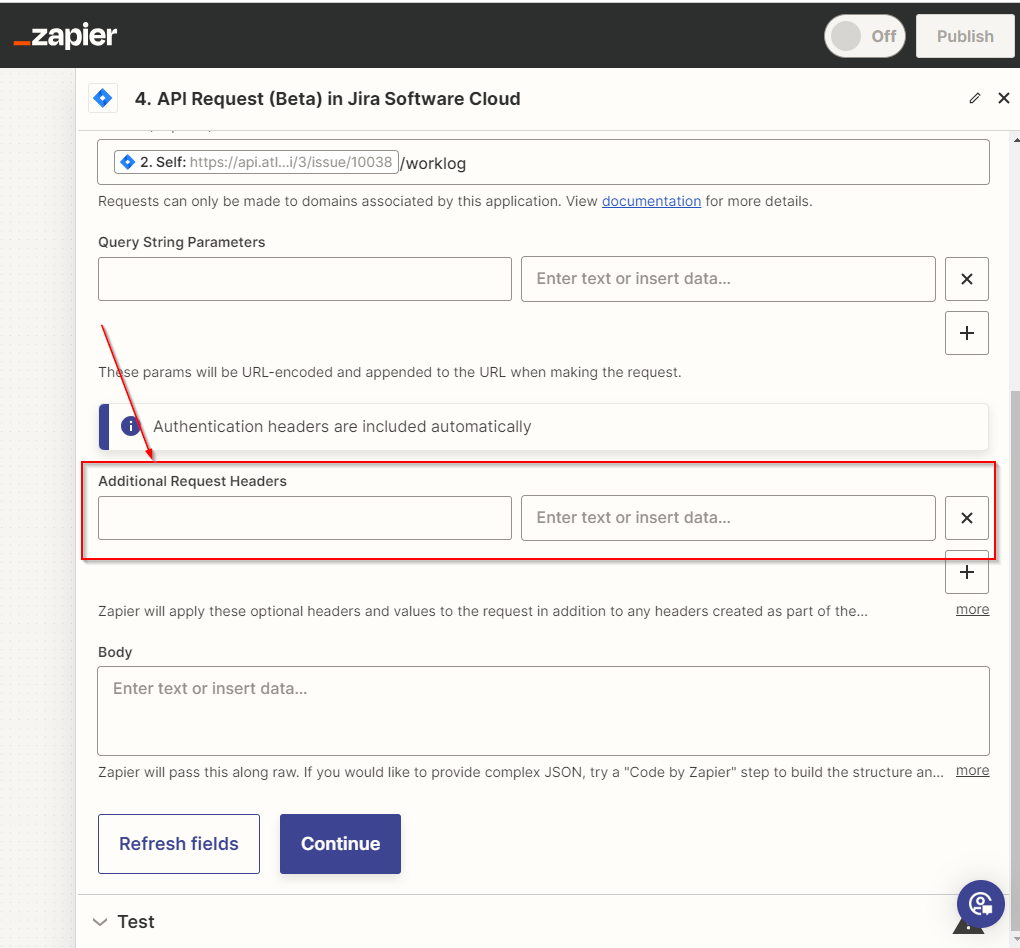
- Include "Content-Type" in this field, and in the adjacent box on the right, enter "application/json".
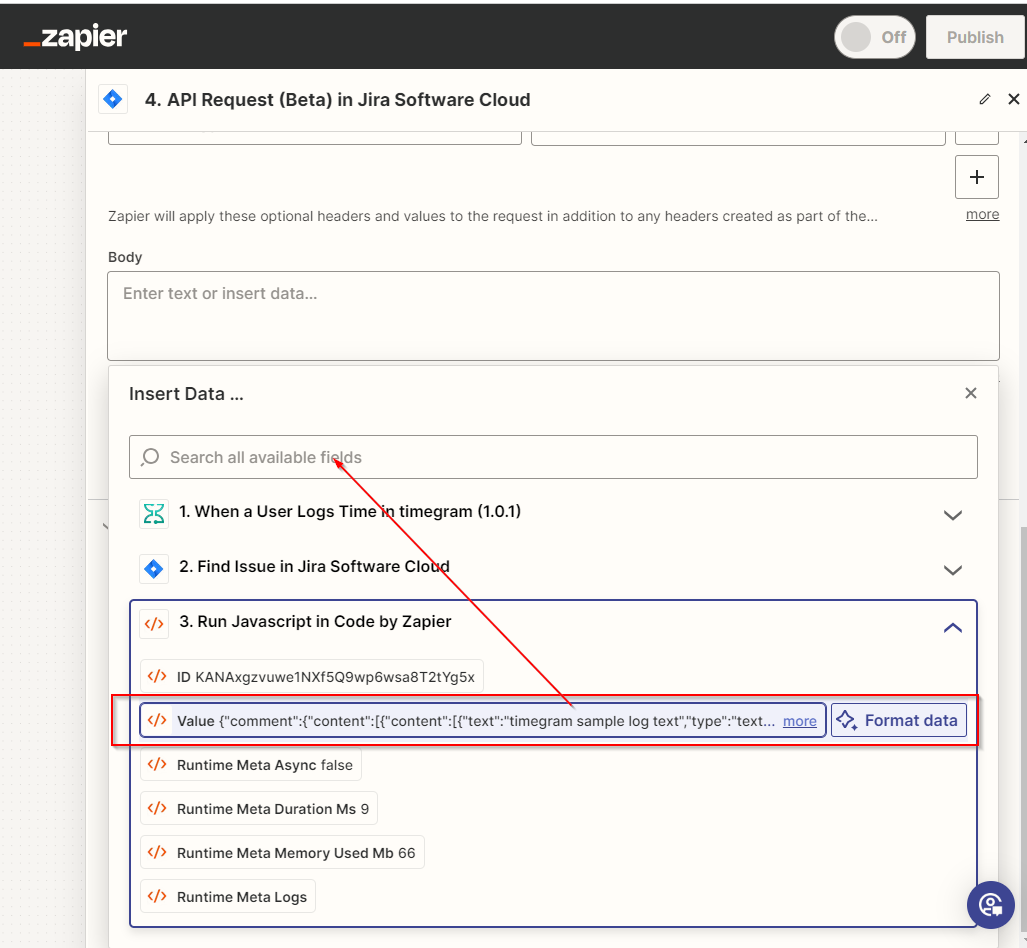
- Next, proceed to fill in the body field located at the bottom of the "Additional Request Headers" section.

- Click on this option and choose "Value" under the "Run Javascript in Code by Zapier" field.
- Click "Continue"
- Now, in the final step, test the actions by clicking on "Test Step".
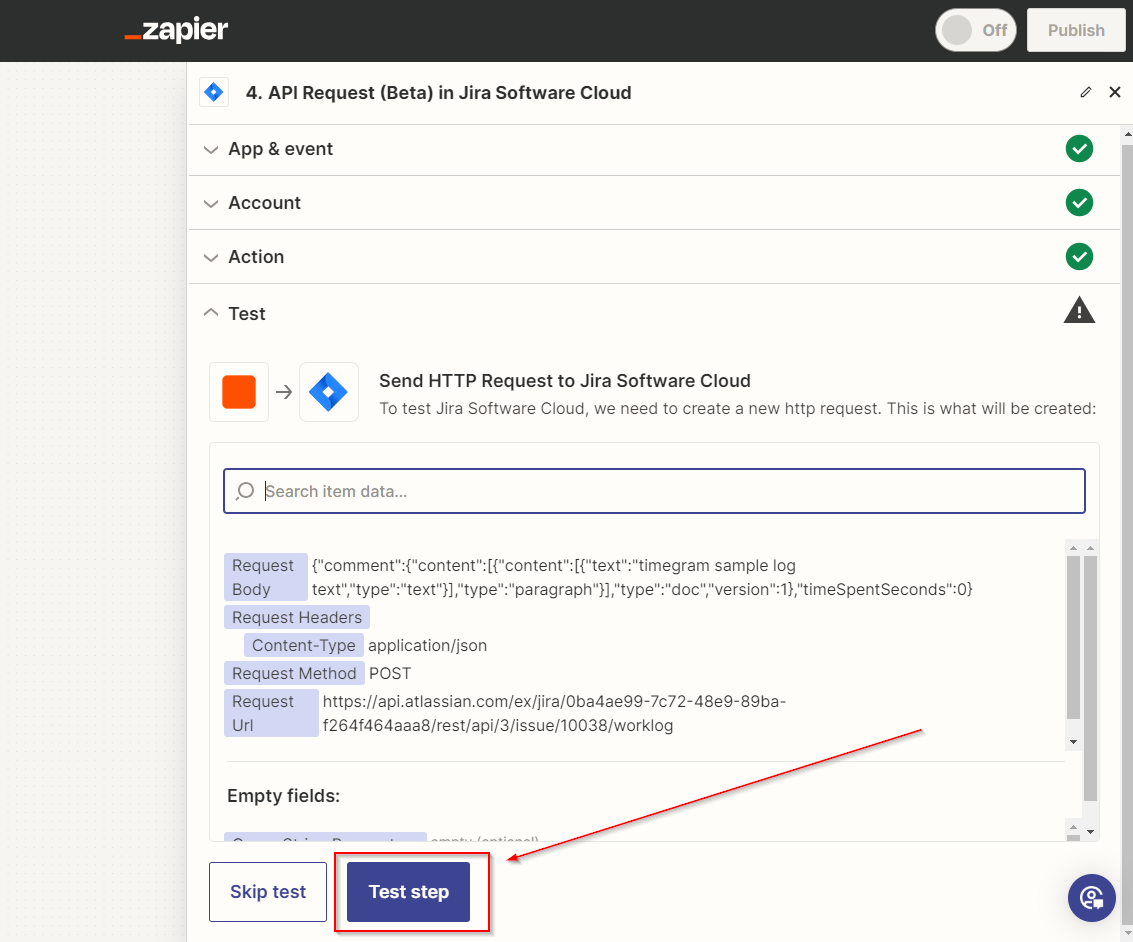
- After clicking on the "Test Step," you will see this message displayed on the screen.

- Select the "Publish" button to start using this integration.
Congratulations! You can now log the time for your Jira task using timegram.