1.7 Download the Highlights App on Mac
Installing Highlights App (Tracker) on Your Mac
Highlights app is a desktop application that records activities on your Mac. In this guide, we'll walk you through the installation process and the necessary configurations to get started.
Step 1: Download and Install the Tracker
Start by downloading the Highlights app from the official website. Once the download is complete, follow these steps:
1. Locate and execute the downloaded application.
2. Complete the installation process.
3. Follow the on-screen instructions to complete the installation.
Step 2: Configure System Settings for Activity Monitoring
To ensure that the Highlights app can effectively monitor your activities, follow these steps:
1. Click on the Apple logo in the top-left corner of your screen.
2. Select "System Preferences" from the drop-down menu.
3. In the System Preferences window, click on "Privacy & Security."

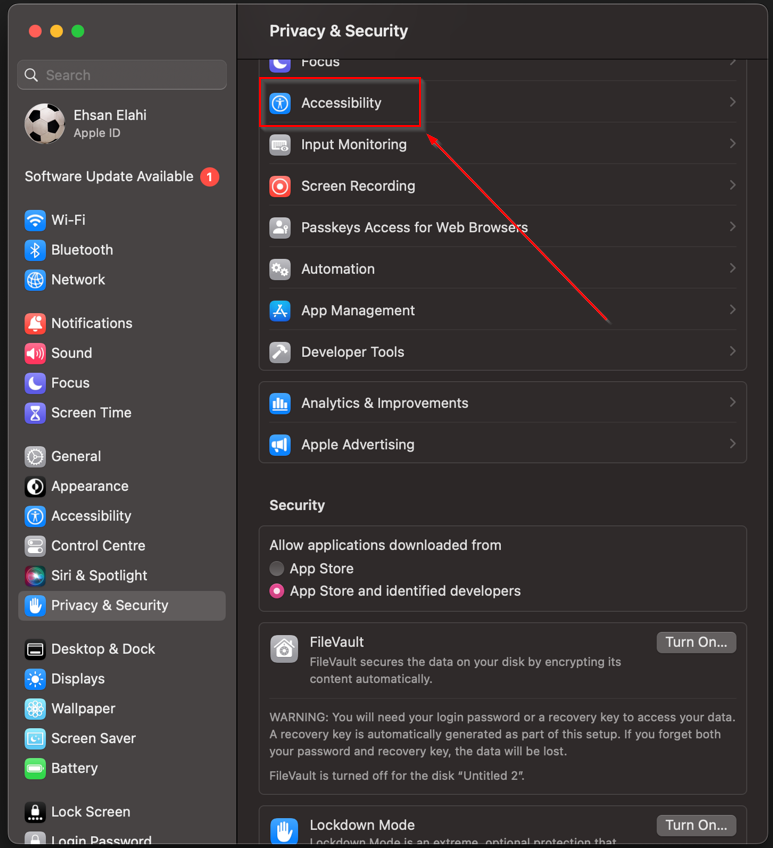
Step 3: Enable Accessibility
In the Privacy & Security settings, navigate to "Accessibility":
1. In the Privacy & Security window, click the "Accessibility" option in the left sidebar.
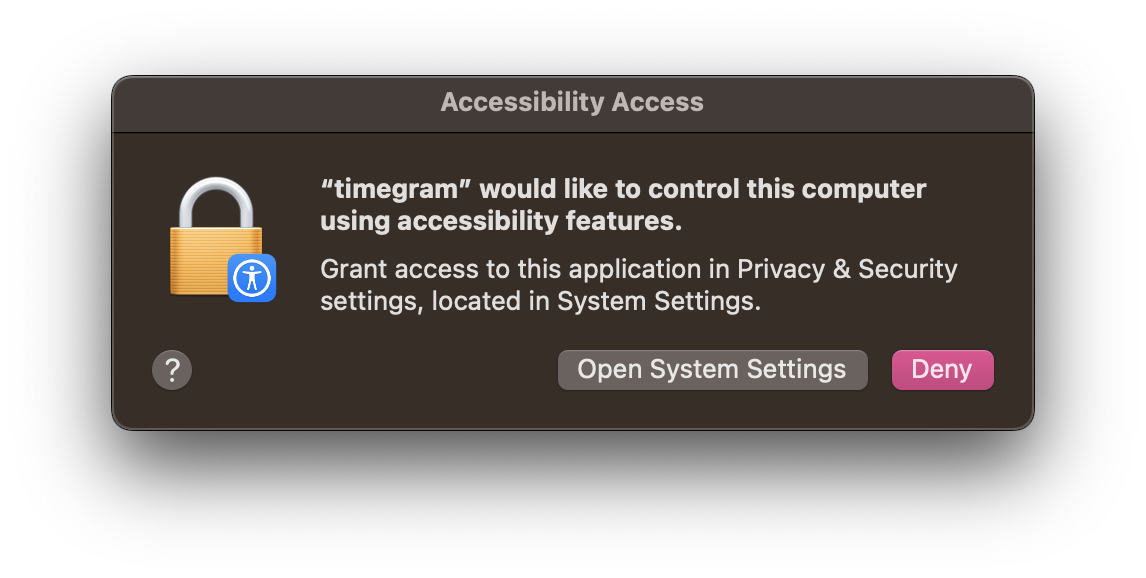
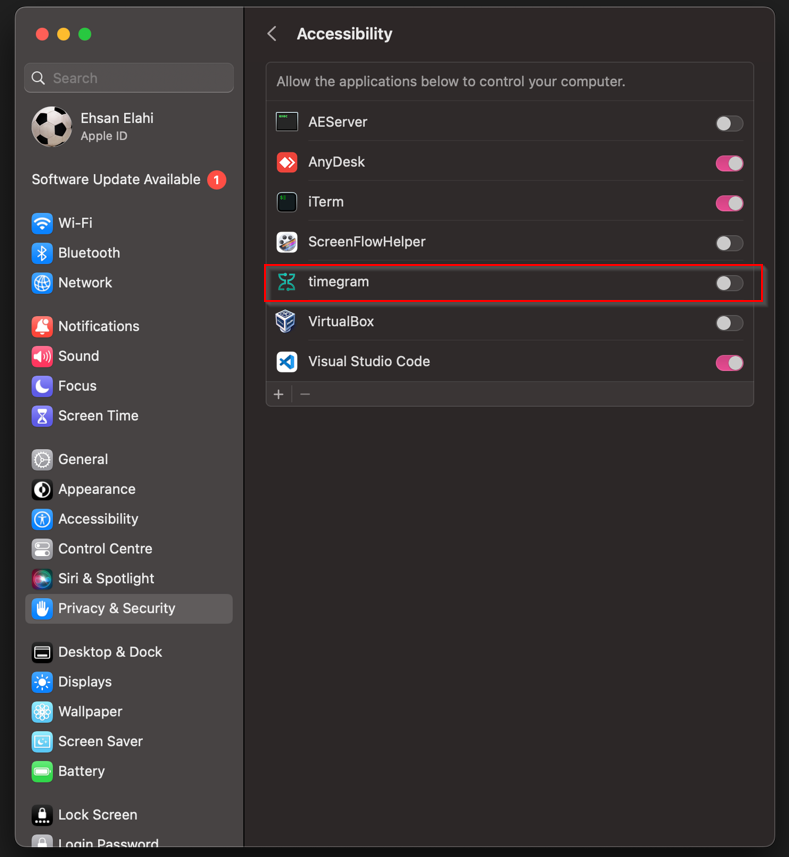
Step 4: Grant Accessibility Permission
To allow the tracker to access your system, follow these steps:
1. Click on the lock icon in the bottom-left corner of the Accessibility window and enter your Mac's password to make changes.
2. Click the "+" button below the list of apps.
3. Select timegram from your Applications folder.
4. Click "Open" to add it to the list of apps with accessibility permissions.
Step 5: Configure Automation Settings
Return to the "Privacy & Security" settings:
1. Click on the "Privacy & Security" label at the top of the window to go back.

Step 6: Grant Automation Permissions
For the tracker to function correctly, you need to grant permission for "System events" and any other specific apps you want to monitor (e.g., "Chrome"). Here's how:
1. In the Privacy & Security window, select "Automation" from the left sidebar.
2. Find and expand the relevant section.
3. Enable permission for "System events" and any other apps you wish to monitor by checking the respective checkboxes.

Step 7: Start Using the Highlights App
With all the necessary permissions granted, the Highlights app is now ready to monitor your activities. Launch the application and start utilizing its features to track and analyze your time usage on your Mac.
By following these steps, you'll successfully install and configure the activity tracker on your Mac, allowing you to monitor your activities with ease.