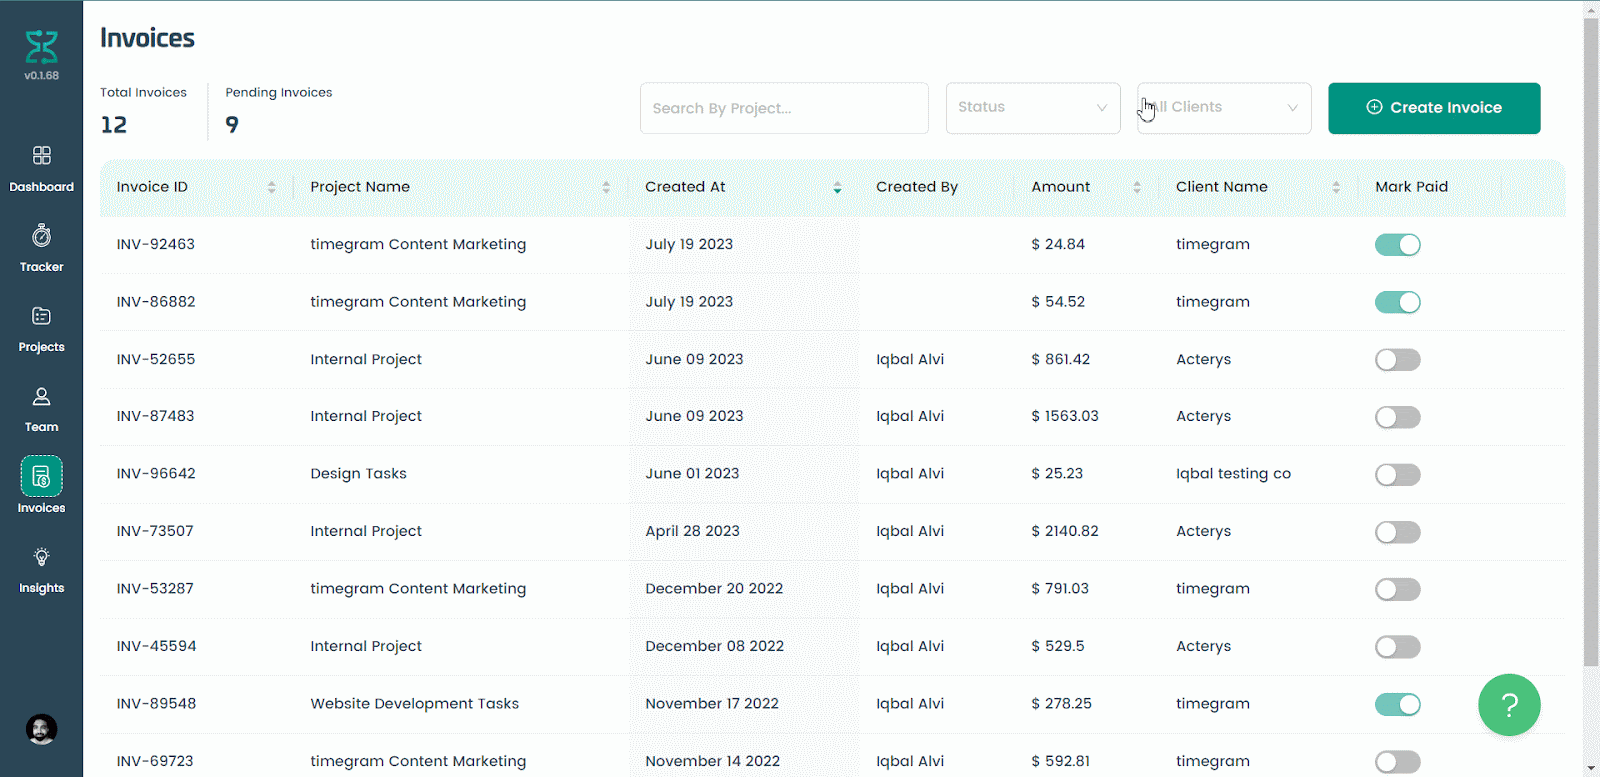
7.1 Create Invoice
Simply go to the ‘Invoice’ module on the left, and then click on ‘Create Invoice’
Step #1 Select Project from dropdown
Once you click on Create Invoice, the following screen will appear.

Select the desired project from the dropdown menu in the 'Invoice' module.

Once you have selected the project, our system will automatically populate the client's details associated with that specific project.
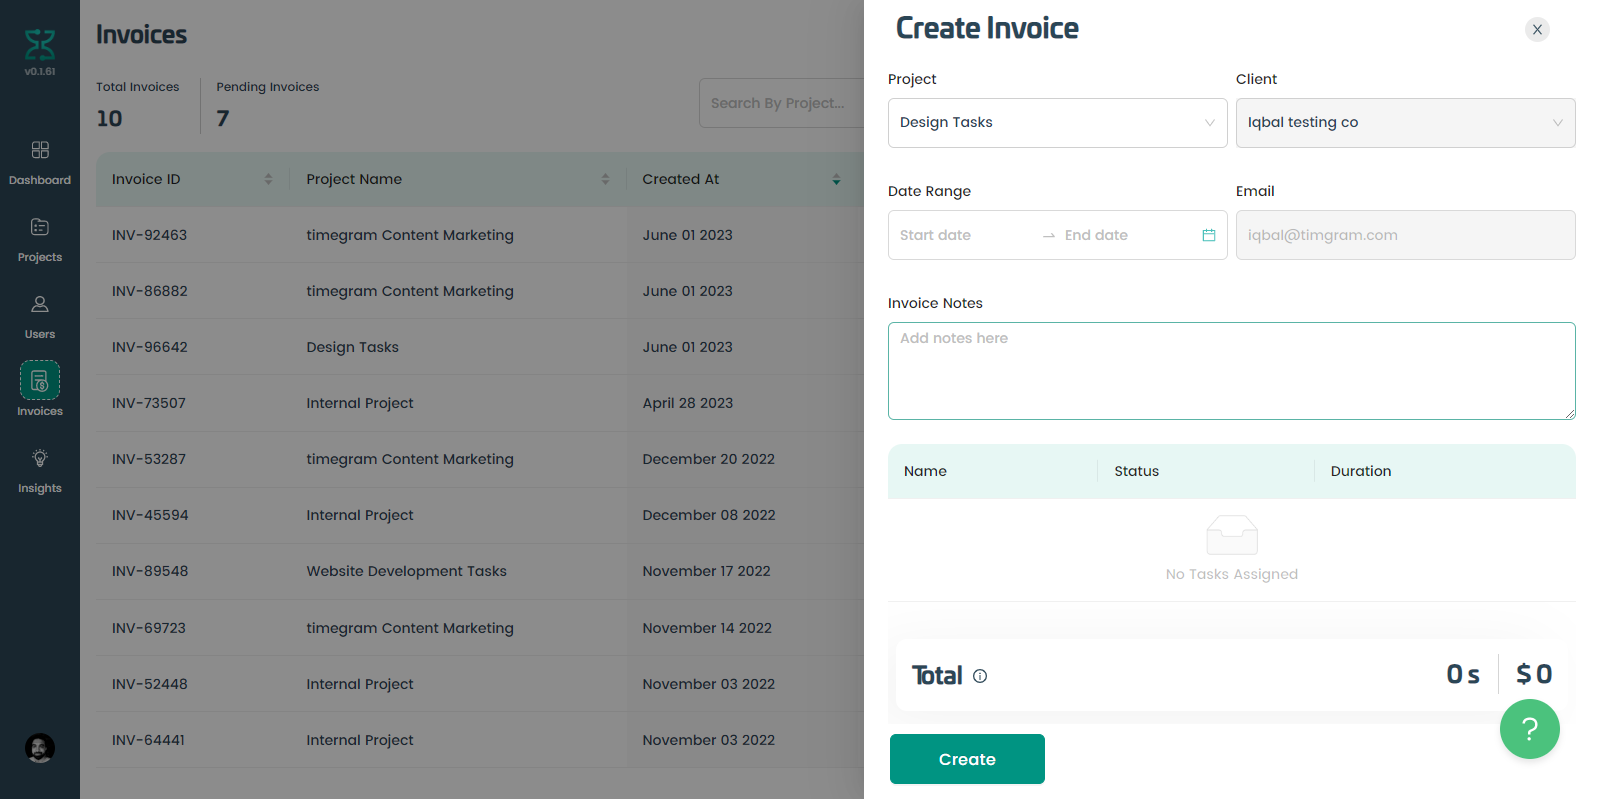
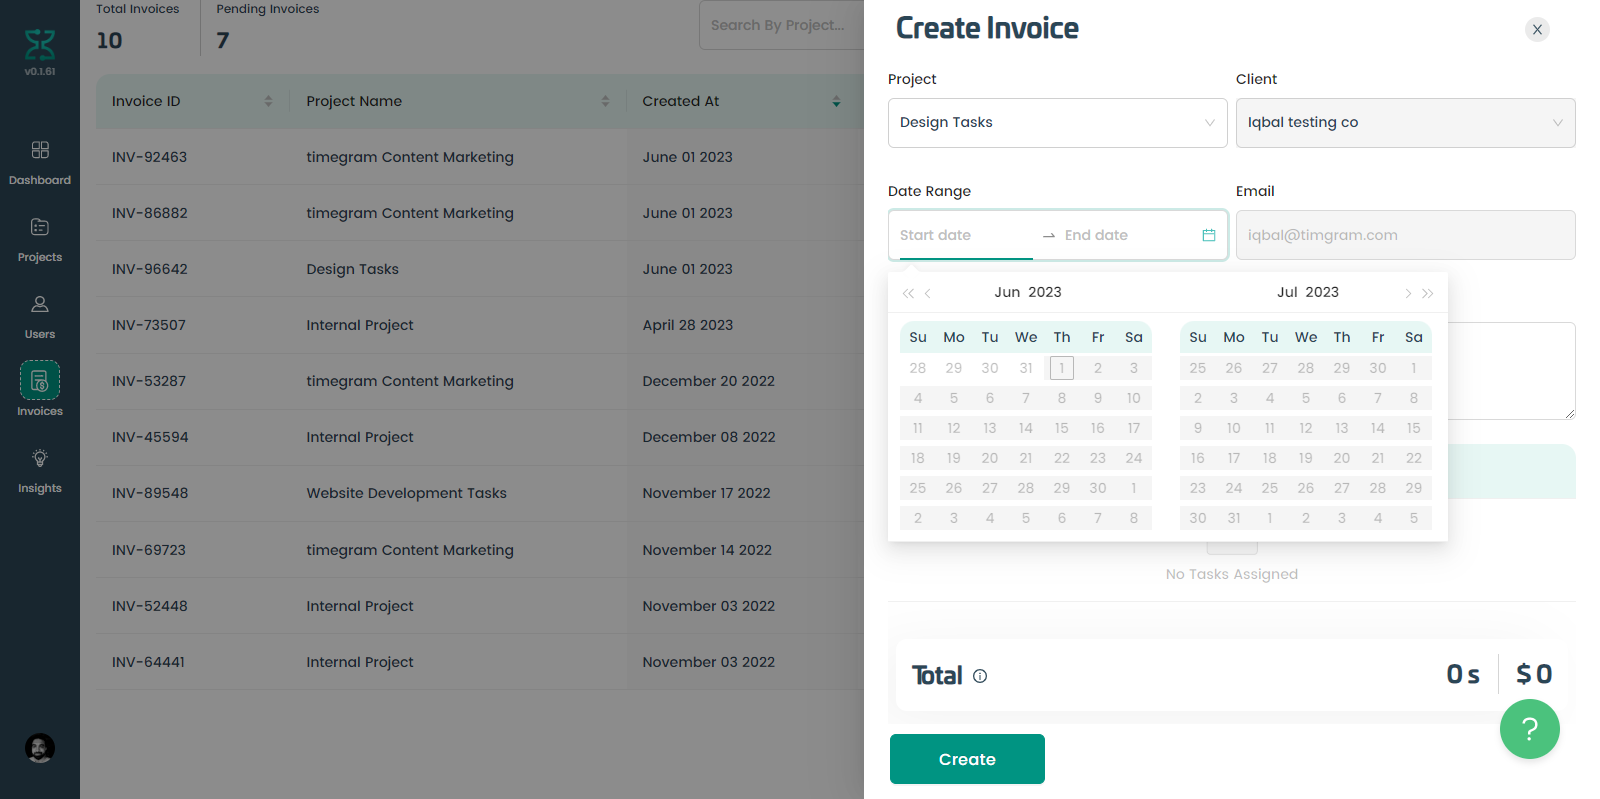
Step #2 Select a date range
Upon clicking the 'date range' option, a dialogue box with a calendar will drop down. Choose the date range for your invoice by specifying the starting and ending dates.
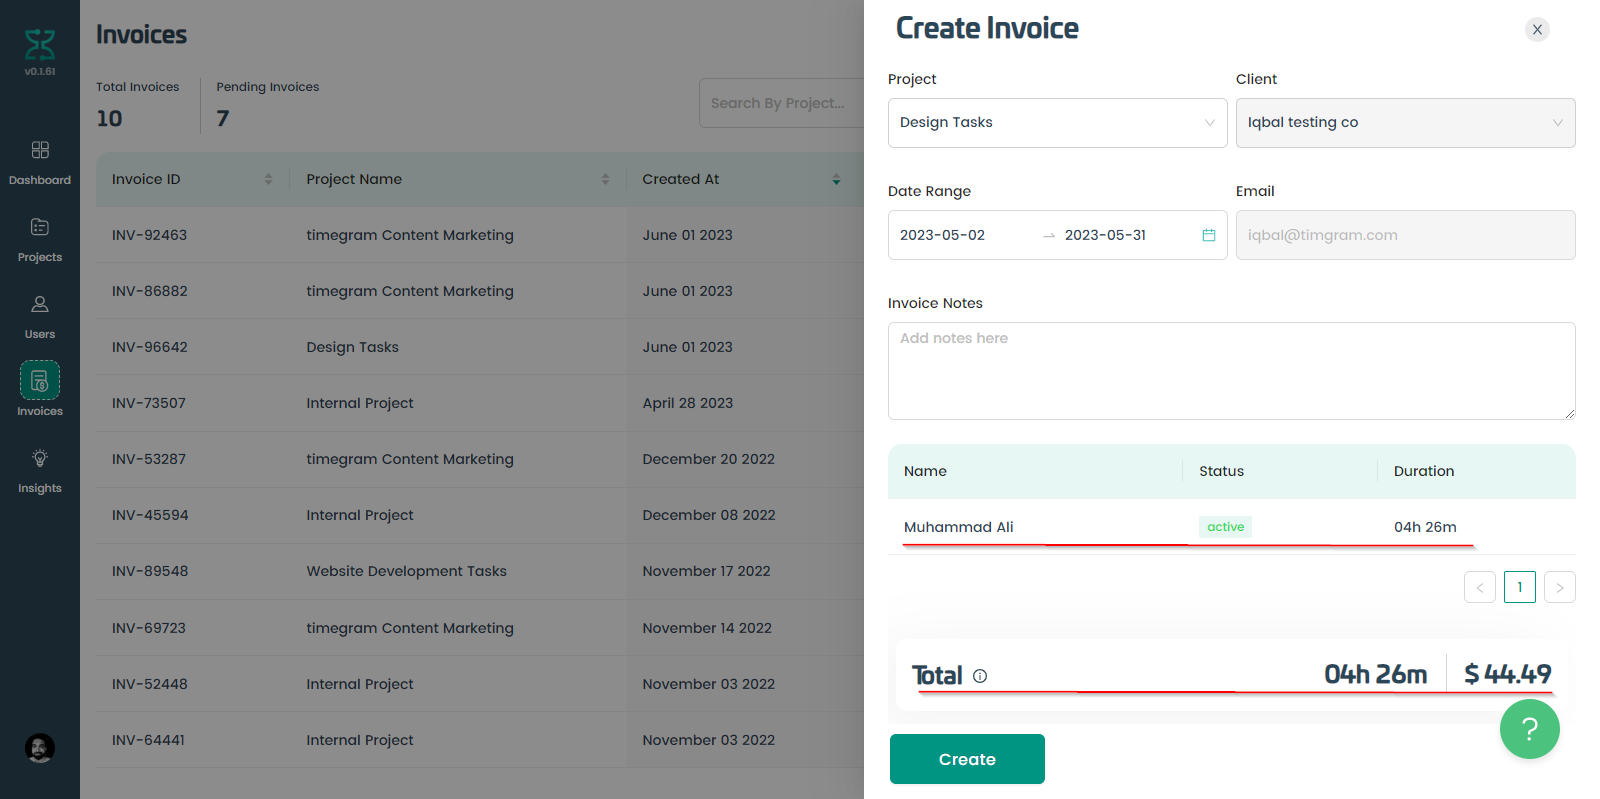
Now that you’ve selected the date range, you will see the employee name, status, and total number of hours worked within that date range. This will give you a quick overview of the total time worked and invoice amount, ensuring transparency and convenience.
Step #3 Add Invoice Notes
You can add any necessary invoice notes in the description box, though it is not required and can be skipped.
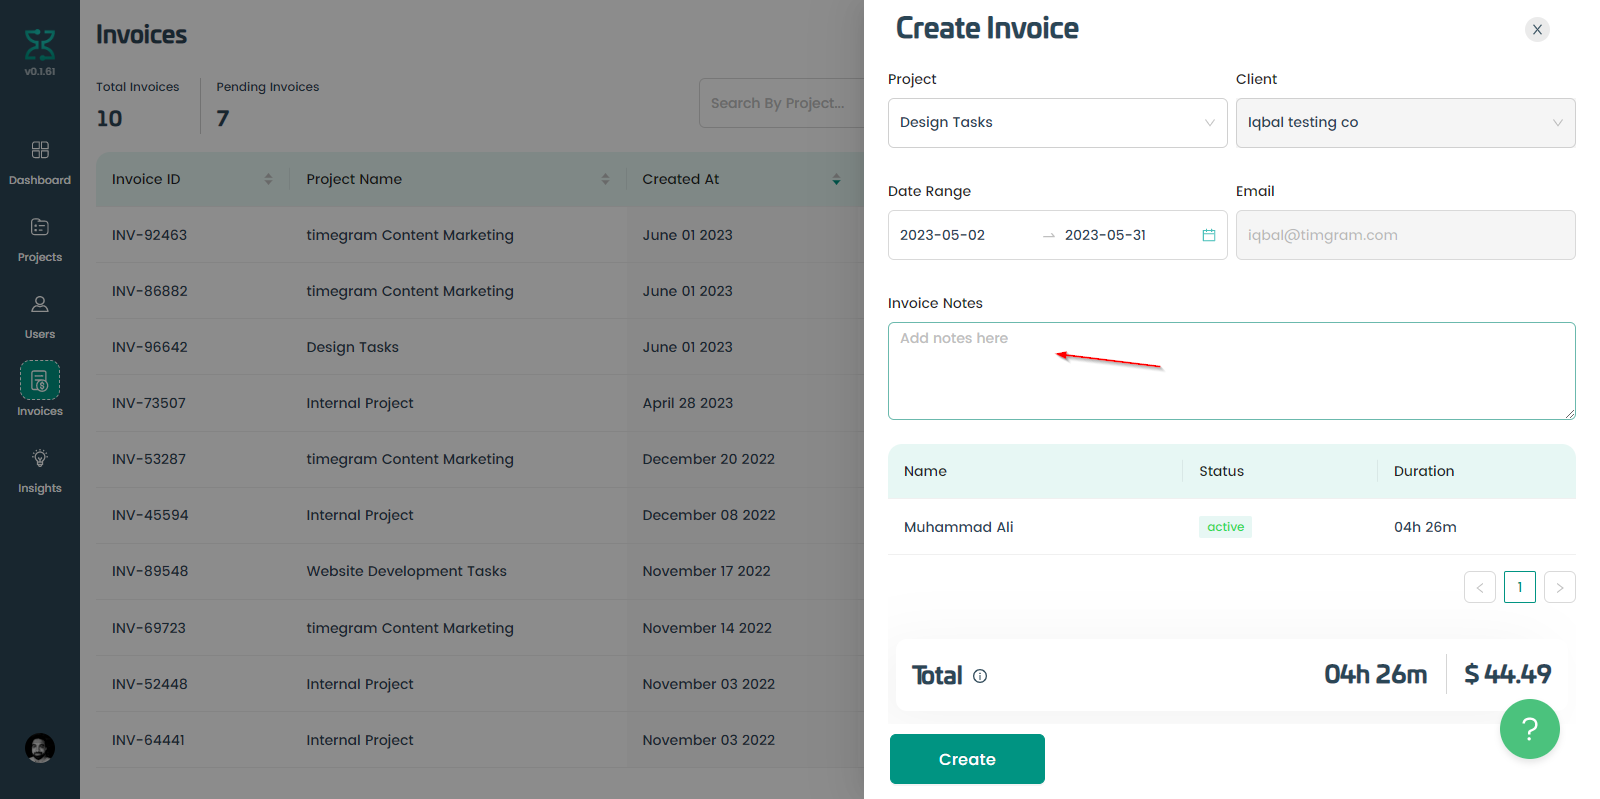
And that’s it. Hit the "Create" button, and your invoice will be created and ready to be shared.