6.1 Users
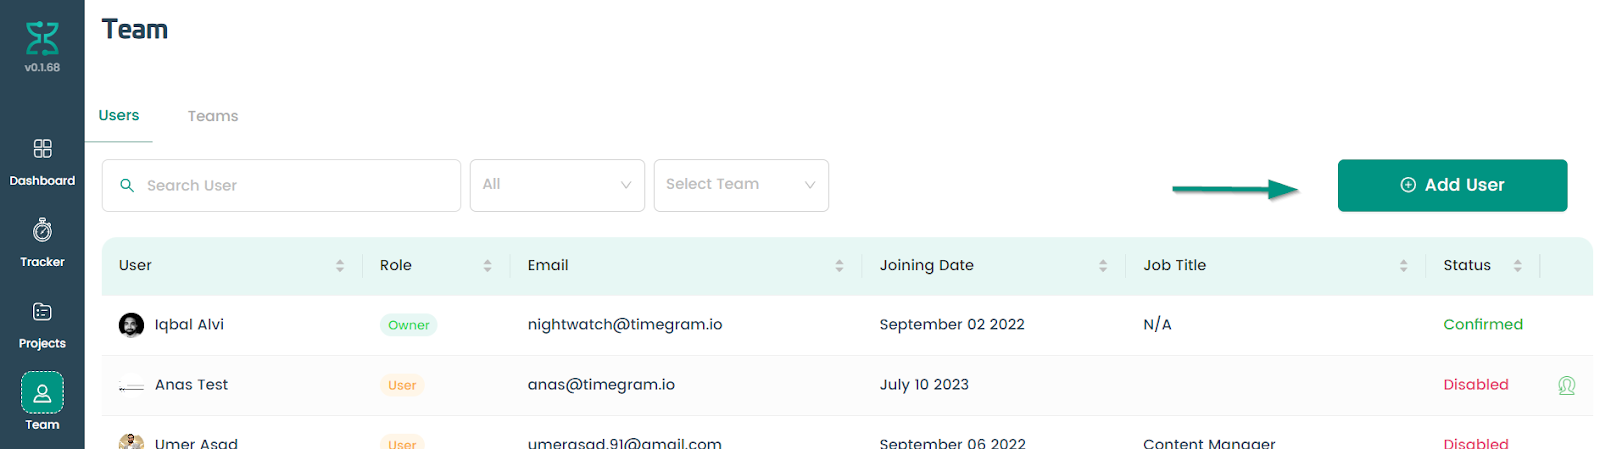
In the Users section, you can see a user dashboard with the following details (from left to right):
- Employee’s name
- User role (User, Manager, or Admin)
- Email address
- Joining date
- Job title (designation)
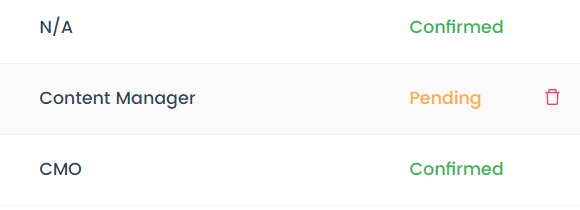
- Account verification status (pending or confirmed)
Edit a User:
If you click on the user's name, you can edit personal details, a window will open which gives you quick access to the user’s hourly pay rate, weekly working capacity, user’s full name, and contact details. You can edit all the details, except for the email address with which the user account is associated.

Once done editing, just click Save, and all the details will be updated on the dashboard.
Delete User:
To delete a user, click on the Delete button (the red bin icon) on the extreme right column .
You will get a a confirmation message. By clicking Yes, the user will be removed from all the projects, tasks, teams, and dashboards.

Note: Projects are not affected by deleting a user. If a project or task was assigned to a user and you delete that user, the project will remain as it is, except that the deleted user profile will not be visible on that project anymore.
There is an option to restore the deleted user; however, it will only restore the user details. You will have to add the user again to all the projects, tasks, and teams.

At the top of the dashboard, you will find a search bar and mtwo filters.
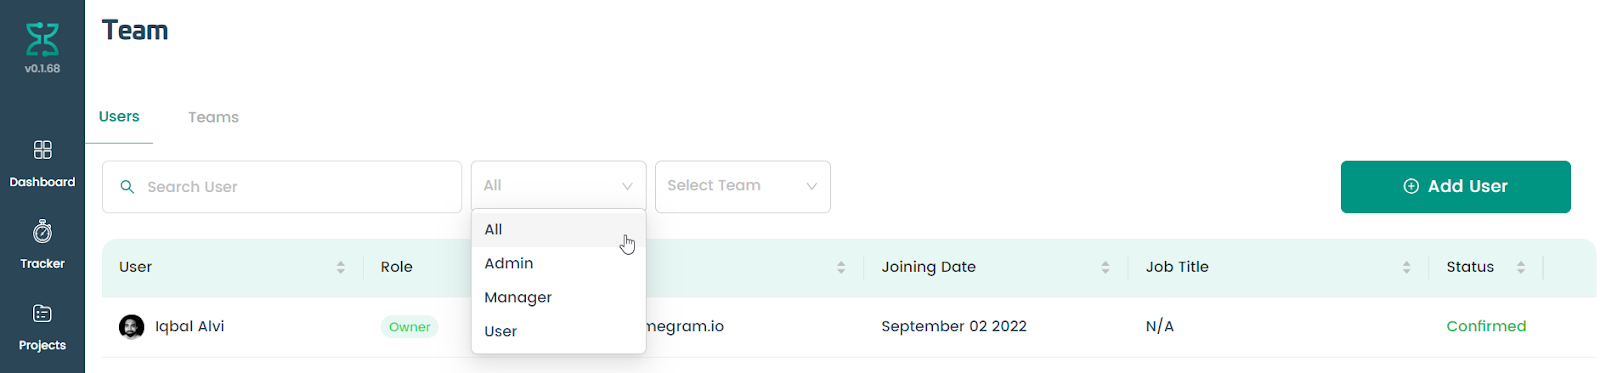
The user role filter allows you sort the list by user role, i.e. Admins, Managers, and Users.
The Select Team filter allows you to view users within specific teams.
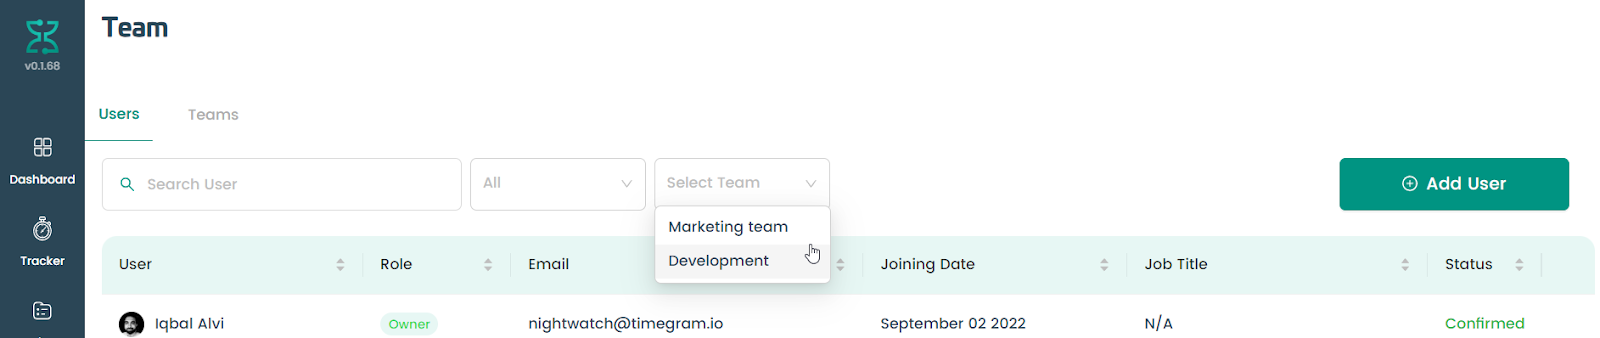
You can combine and use these two filters simultaneously.
6.1.1 Add Users to Your Team
In the Users section, simply click on ‘Add User’ located in the top right corner of your screen. This will open a window from where you can invite other users, managers, or admins to timegram.
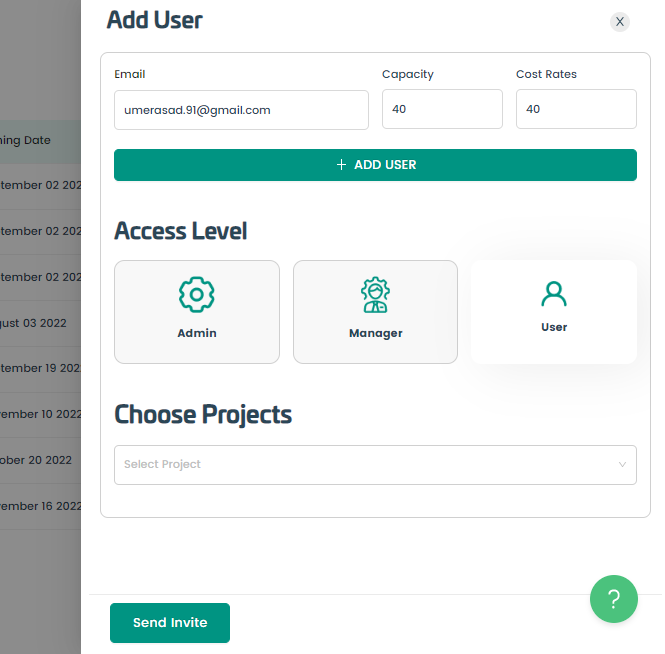
Step #1: Add the email address of the person you want to invite, the number of hours that person is expected to deliver in a week, and the per-hour rate you will pay that individual.
You can add multiple people by clicking on the “Add User” button.
Step #2: Choose the access level, whether you want to add the person as an Admin (complete access to the organization), Manager (team-level access), or a User (basic access to tasks).
Step #3: Choose the projects you want to add the team member(s) to. This is optional and you can do that later from the Projects module.
Step #4: Click on the ‘Send Invite’ button.
This will send an invite to the team member(s) you want to add. Until the invite is accepted, your Users screen will show a ‘pending’ status against the new team member’s name.

This status will change to ‘confirmed’ as soon as the invite gets accepted.